TS-7600: Difference between revisions
No edit summary |
|||
| Line 20: | Line 20: | ||
|data9 = [http://cache.freescale.com/files/dsp/doc/ref_manual/MCIMX28RM.pdf?fpsp=1 CPU Datasheet] | |data9 = [http://cache.freescale.com/files/dsp/doc/ref_manual/MCIMX28RM.pdf?fpsp=1 CPU Datasheet] | ||
|header10 = RAM | |header10 = RAM | ||
|data11 = 128MB | |data11 = 128MB or 256MB DDR2 | ||
|header12 = FPGA | |header12 = FPGA | ||
|data13 = Lattice LFXP2 5K | |data13 = Lattice LFXP2 5K | ||
| Line 47: | Line 47: | ||
= Overview = | = Overview = | ||
The TS-7600 was released April. 2013. This is a small embedded board with a Freescale i.MX283 454Mhz ARM9 CPU, Lattice XP2 5k FPGA, and 128-256MB | The TS-7600 was released April. 2013. This is a small embedded board with a Freescale i.MX283 454Mhz ARM9 CPU, Lattice XP2 5k FPGA, and 128-256MB DDR2. | ||
= Getting Started = | = Getting Started = | ||
| Line 105: | Line 105: | ||
{{Warning|Be sure to take appropriate Electrostatic Discharge (ESD) precautions. Disconnect the power source before moving, cabling, or performing any set up procedures. Inappropriate handling may cause damage to the board.}} | {{Warning|Be sure to take appropriate Electrostatic Discharge (ESD) precautions. Disconnect the power source before moving, cabling, or performing any set up procedures. Inappropriate handling may cause damage to the board.}} | ||
The TS-7600 has 2 ways that it can be powered. The TS- | The TS-7600 has 2 ways that it can be powered. The TS-7600 has a 5V line on the [[#44 Pin Header]] which can be used to supply power. The TS-752 baseboard can power the 5V rail through the terminal blocks with the PS-5VDC-REG-8PG. The second option is to use the USB Device port which can provide 500mA at 5V. The TS-7600 will require approximately 250mA at idle. An ideal power supply for the TS-7600 will allow up to 1A. | ||
[[File:TS-7500-Powerinput.jpg|500px]] | [[File:TS-7500-Powerinput.jpg|500px]] | ||
Revision as of 21:41, 16 May 2013
This board is still only available as an engineering sample and is subject to change. The hardware is finalized, but the FPGA register layout is still expected to change and software is still being finalized.
 | |||
| Product Page | |||
| Documentation | |||
|---|---|---|---|
| Schematic | |||
| Mechanical Drawing | |||
| FTP Path | |||
| Processor | |||
| Freescale i.MX283 | |||
| 454MHz ARM9 | |||
| CPU Datasheet | |||
| RAM | |||
| 128MB or 256MB DDR2 | |||
| FPGA | |||
| Lattice LFXP2 5K | |||
| Reprogrammable with Opencore | |||
| DIO | |||
| 55x DIO | |||
| External Interfaces | |||
| USB 2.0 2 hosts | |||
| 1x 10/100 Ethernet | |||
| 1x I2C/TWI | |||
| SPI | |||
| 8x TTL UART | |||
| Internal Storage Media | |||
| 2x SD | |||
| Power Requirements | |||
| 5VDC, or USB Device | |||
| Operates around 1.2W | |||
| Operating Temperature | |||
| |||
| |||
| Mechanical | |||
| 66.04mm X 74.30mm | |||
| Height 17.10mm (approx) | |||
| Weight 41.6g (approx) | |||
Overview
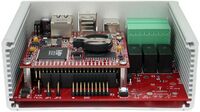
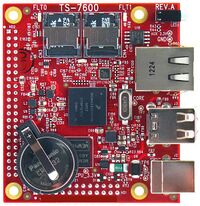
The TS-7600 was released April. 2013. This is a small embedded board with a Freescale i.MX283 454Mhz ARM9 CPU, Lattice XP2 5k FPGA, and 128-256MB DDR2.
Getting Started
A Linux PC is recommended for development, and will be assumed for this documentation. For users in Windows or OSX we recommend virtualizing a Linux PC. Most of our platforms run Debian and if there is no personal distribution preference this is what we recommend for ease of use.
Virtualization
Suggested Linux Distributions
It may be possible to develop using a Windows or OSX system, but this is not supported. Development will include accessing drives formatted for Linux and often Linux based tools.
Development Kit and Accessories
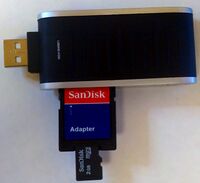
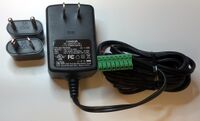
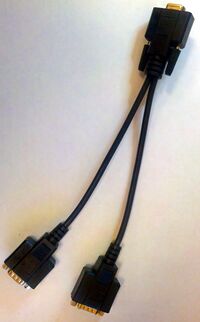
The KIT-7600 includes the items that are necessary for development with the TS-7600.
The other options include:
| Item | Description |
|---|---|
|
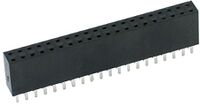
The CN-PC104-40PIN-F is the mating connector for the 44 pin male header on the SBC. The 4 omitted pins are the JTAG pins which are only used for factory programming. The pins on this header are a very common 0.100" pitch. |

|
The WIFI-N-USB is an ASUS 802.11N adapter. See the WIFI-N-USB page for more details. |

|
The TS-ENC750 provides both the TS-752 and a metal enclosure. |
|
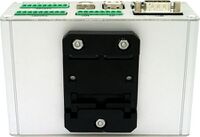
The TS-ENC750-DIN is the TS-ENC750 with a DIN rail mount. |
|
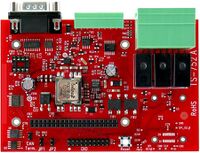
The TS-752 demonstrates the flexibility of a Technologic Systems SoM by connecting FPGA driven IO pins to relays, buffered digital inputs, buffered digital outputs, and RS-485 drivers. It also provides an RS-232 driver for the serial console. A TS-ENC750 with a TS-7500 or TS-7550 can provide a complete solution for many embedded applications. |
Booting up the board
| WARNING: | Be sure to take appropriate Electrostatic Discharge (ESD) precautions. Disconnect the power source before moving, cabling, or performing any set up procedures. Inappropriate handling may cause damage to the board. |
The TS-7600 has 2 ways that it can be powered. The TS-7600 has a 5V line on the #44 Pin Header which can be used to supply power. The TS-752 baseboard can power the 5V rail through the terminal blocks with the PS-5VDC-REG-8PG. The second option is to use the USB Device port which can provide 500mA at 5V. The TS-7600 will require approximately 250mA at idle. An ideal power supply for the TS-7600 will allow up to 1A.
| WARNING: | Do not use multiple power connections simultaneously or you may damage the board. |
Once you have applied power you should look for console output. The first output is from the bootrom:
  >> TS-BOOTROM - built Apr 12 2013 13:35:38
  >> Copyright (c) 2009, Technologic Systems
  >> Booting from SD card...
  .
  .
  .
This output will only appear on the serial console on the 26 pin header and cannot be redirected like the rest of the booting messages. The "Booting From" message will indicate your boot media. The 3 dots after indicate steps of the booting procedure. The first dot means the MBR was copied into memory and executed. The next two dots indicate that the MBR executed and the kernel and initrd were found and copied to memory.
Get a Console
Option 1: Telnet
If your system is configured with zeroconf support (Avahi, Bonjour, etc) you can simply connect to the TS-7600 with:
telnet ts7600-<last 6 characters of the MAC address>
# You will need to use your TS-7600 MAC address, but
# for example if you mac is 00:d0:69:01:02:03
telnet ts7600-010203
When the board first powers up it has two network interfaces. The first interface eth0 is configured to use IPv4LL, and eth0:0 is configured to use DHCP. The board broadcasts using multicast DNS advertising the _telnet._tcp service. You can use this to query all of the available TS-7600s on the network.
From Linux you can use the avahi commands to query for all telnet devices with:
avahi-browse _telnet._tcp
Which would return:
+   eth0 IPv4 TS-7600 console [4f47a5]                      Telnet Remote Terminal local
+   eth0 IPv4 TS-7600 console [4f471a]                      Telnet Remote Terminal local
This will show you the mac address you can use to resolve the board. In this case you can connect to either ts7600-4f47a5 or ts7600-4f47a5.
From Windows you can use Bonjour Print Services to get the dns-sd command. OSX also comes preinstalled with the same command. Once this is installed you can run:
dns-sd -B _telnet._tcp
Which will return:
Browsing for _telnet._tcp
Timestamp     A/R Flags if Domain                    Service Type              Instance Name
10:27:57.078  Add     3  2 local.                    _telnet._tcp.             TS-7600 console [4f47a5]
10:27:57.423  Add     3  2 local.                    _telnet._tcp.             TS-7600 console [4f47a5]
This will show you the mac address you can use to resolve the board. In this case you can connect to either ts7600-4f47a5 or ts7600-4f47a5.
Option 2: Serial Console
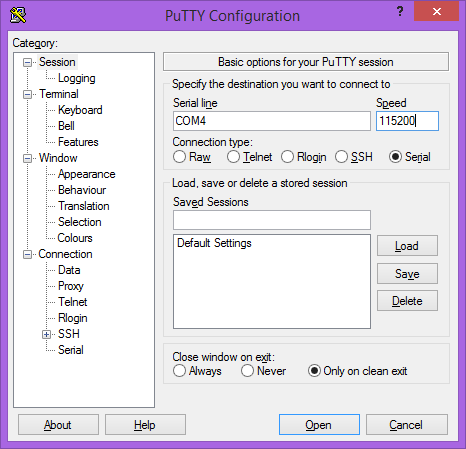
With the development kit you should have the TS-752 which brings out the debug console ttyS0 from the ARM processor as RS232. Custom baseboards should emulate the TS-752 for bringing out console. See the schematics available on the TS-752 page. The console from the UART will use 115200 baud, 8n1 (8 data bits 1 stop bit), and no flow control.
| Note: | If DIO_9 is held low during boot until the red LED comes on (around 5 seconds), console will be redirected to XUART 0. On most baseboards where this is applicable, DIO_9 is an exposed button. |
Console from Linux
There are many serial terminal applications for Linux, three common used applications are picocom, screen, and minicom. These examples demonstrate all three applications and assume that the serial device is "/dev/ttyUSB0" which is common for USB adapters. Be sure to replace the serial device string with that of the device on your workstation.
picocom is a very small and simple client.
sudo picocom -b 115200 /dev/ttyUSB0
screen is a terminal multiplexer which happens to have serial support.
sudo screen /dev/ttyUSB0 115200
Or a very commonly used client is minicom which is quite powerful but requires some setup:
sudo minicom -s
- Navigate to 'serial port setup'
- Type "a" and change location of serial device to "/dev/ttyUSB0" then hit "enter"
- If needed, modify the settings to match this and hit "esc" when done:
     E - Bps/Par/Bits          : 115200 8N1
     F - Hardware Flow Control : No
     G - Software Flow Control : No
- Navigate to 'Save setup as dfl', hit "enter", and then "esc"
Console from Windows
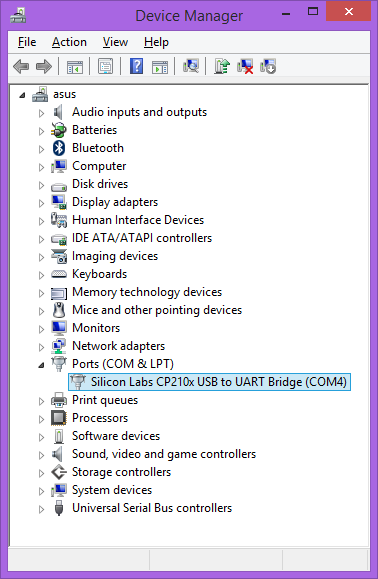
Putty is a small simple client available for download here. Open up Device Manager to determine your console port. See the putty configuration image for more details.
Initrd / Busybox
When the board first boots up you should have a console such as:
>> TS-BOOTROM - built Jan 21 2013 16:17:55
>> Copyright (c) 2012, Technologic Systems
.
.
Uncompressing Linux... done, booting the kernel.
Booted in 0.67 s
Type 'tshelp' for help
This is a minimalistic initial ram filesystem that includes our specific utilities for the board, and is then used to bootstrap the Linux root. The initramfs is built into the kernel image so it cannot be modified without rebuilding the kernel, but it does include 8 bits for common configuration option we call soft jumpers.
| Jumper | Function |
| 1 | Boot automatically to Debian [1] |
| 2 | Baseboard Specific |
| 3 | Baseboard Specific |
| 4 | Read Only mode [2] |
| 5 | Disable Network Autoconfiguration [3] |
| 6 | Reserved |
| 7 | Reserved |
| 8 | Reserved |
- ↑ initramfs boot is default
- ↑ The read only mode creates a unionfs where the full Linux root is mounted read only, and a tmpfs is mounted read/write. This allows services to run that require write access, but doesn't commit any changes to disk. This can be used to protect your application from corruption caused by sudden poweroffs.
- ↑ Do not disable this without having access to a Serial Console. The default will bring up the network interface with link-local addressing (ipv4ll), and a virtual interface (eg, eth0:0) with a dhcp address. The ipv4ll address will come up almost immediately and resolve as long as zeroconf is working. The DHCP interface can take several seconds to resolve depending on the DHCP server present on the network.
There are 2 ways to manipulate soft jumpers on the board. The web interface at "http://ts7600-<last 6 chars of the MAC" has a list of checkboxes that will immediately change the values. You can also use tshwctl:
# Boot automatically to Debian:
tshwctl --setjp=1

# Or revert to the initramfs:
tshwctl --removejp=1
Many applications are capable of running from the initramfs. Even though the full Linux root has not booted at this point, $PATH and symlinks make it possible to run many applications. The default initramfs startup script will execute "/ts/init" in the Linux Root which can be used for any initialization that is required. When executing in this environment there are several differences from Debian:
- The second partition is mounted at /mnt/root/ as read only
- You can mount this as read/write with:
mount -o remount,rw /mnt/root/
# Write data
mount -o remount,ro /mnt/root/
sync
- Make sure the SD card is mounted read only when the write is complete to avoid corruption caused by unplanned power outages. Interrupting a write to the SD card can cause corruption.
- $PATH is set up to use /bin:/sbin:/mnt/root/bin:/mnt/root/sbin:/usr/bin:/usr/sbin.
- Do not use apt-get in this environment. This is not where the Debian/OE install scripts are intended to run and will have unintended side effects. You can type "exit" to do a full boot to run these utilities.
- The shell is using busybox sh which is optimized for size so many utilities do not implement all options as the GNU alternative. Many times the best documentation for these utilities is in the comments in the utilitys' source code. The other option is to call the full Linux utility by full path. For example, to call Debian's "ls" utility you would use /mnt/root/bin/ls.
Debian Configuration
For development, it is recommended to work directly in Debian on the SD card. Debian provides many more packages and a much more familiar environment for users already versed in Debian. Through Debian it is possible to configure the network, use the 'apt-get' suite to manage packages, and perform other configuration tasks. Out of the box the Debian distribution does not have any default username/password set. The account "root" is set up with no password configured. It is possible to log in via the serial console without a password but many services such as ssh will require a password set or will not allow root login at all. It is advised to set a root password and create a user account when the unit is first booted.
| Note: | Setting up a password for root is only feasible on the uSD image. |
It is also possible to cross compile applications. Using a Debian host system will allow for installing a cross compiler to build applications. The advantage of using a Debian host system comes from compiling against libraries. Debian cross platform support allows one to install the necessary development libraries on the host, building the application on the host, and simply installing the runtime libraries on the target device. The library versions will be the same and completely compatible with each other. See the respective Debian cross compiling section for more information.
Configuring the Network
From almost any Linux system you can use "ip" or the ifconfig/route commands to initially set up the network. To configure the network interface manually you can use the same set of commands in the initramfs or Debian.
# Bring up the CPU network interface
ifconfig eth0 up

# Or if you're on a baseboard with a second ethernet port, you can use that as:
ifconfig eth1 up

# Set an ip address (assumes 255.255.255.0 subnet mask)
ifconfig eth0 192.168.0.50

# Set a specific subnet
ifconfig eth0 192.168.0.50 netmask 255.255.0.0

# Configure your route.  This is the server that provides your internet connection.
route add default gw 192.168.0.1

# Edit /etc/resolv.conf for your DNS server
echo "nameserver 192.168.0.1" > /etc/resolv.conf
Most commonly networks will offer DHCP which can be set up with one command:
Configure DHCP in Debian:
# To setup the default CPU ethernet port
dhclient eth0
# Or if you're on a baseboard with a second ethernet port, you can use that as:
dhclient eth1
# You can configure all ethernet ports for a dhcp response with
dhclient
Configure DHCP in the initrd:
udhcpc -i eth0
# Or if you're on a baseboard with a second ethernet port, you can use that as:
udhcpc -i eth1
To make your network settings take effect on startup in Debian, edit /etc/network/interfaces:
 # Used by ifup(8) and ifdown(8). See the interfaces(5) manpage or
 # /usr/share/doc/ifupdown/examples for more information.

 # We always want the loopback interface.
 #
 auto lo
 iface lo inet loopback

 auto eth0
 iface eth0 inet static
   address 192.168.0.50
   netmask 255.255.255.0
   gateway 192.168.0.1
 auto eth1
 iface eth1 inet dhcp
| Note: | During Debian's startup it will assign the interfaces eth0 and eth1 to the detected mac addresses in /etc/udev/rules.d/70-persistent-net.rules. If the system is imaged while this file exists it will assign the new interfaces as eth1 and eth2. This file is generated automatically on startup, and should be removed before your first software image is created. The initrd network configuration does not use this file. |
In this example eth0 is a static configuration and eth1 receives its configuration from the DHCP server. For more information on network configuration in Debian see their documentation here.
Installing New Software
Debian provides the apt-get system which lets you manage pre-built applications. Before you do this you need to update Debian's list of package versions and locations. This assumes you have a valid network connection to the internet.
| Note: | The NAND image is based on the emdebian project which is no longer maintained. |
Debian Squeeze has been moved to archive so you will need to update /etc/apt/sources.list to contain only these two lines:
 deb http://archive.debian.org/debian squeeze main
 deb-src http://archive.debian.org/debian squeeze main
apt-get update
For example, lets say you wanted to install openjdk for Java support. You can use the apt-cache command to search the local cache of Debian's packages.
 <user>@<hostname>:~# apt-cache search openjdk
 icedtea-6-jre-cacao - Alternative JVM for OpenJDK, using Cacao
 icedtea6-plugin - web browser plugin based on OpenJDK and IcedTea to execute Java applets
 openjdk-6-dbg - Java runtime based on OpenJDK (debugging symbols)
 openjdk-6-demo - Java runtime based on OpenJDK (demos and examples)
 openjdk-6-doc - OpenJDK Development Kit (JDK) documentation
 openjdk-6-jdk - OpenJDK Development Kit (JDK)
 openjdk-6-jre-headless - OpenJDK Java runtime, using Hotspot Zero (headless)
 openjdk-6-jre-lib - OpenJDK Java runtime (architecture independent libraries)
 openjdk-6-jre-zero - Alternative JVM for OpenJDK, using Zero/Shark
 openjdk-6-jre - OpenJDK Java runtime, using Hotspot Zero
 openjdk-6-source - OpenJDK Development Kit (JDK) source files
 openoffice.org - office productivity suite
 freemind - Java Program for creating and viewing Mindmaps
 default-jdk-doc - Standard Java or Java compatible Development Kit (documentation)
 default-jdk - Standard Java or Java compatible Development Kit
 default-jre-headless - Standard Java or Java compatible Runtime (headless)
 default-jre - Standard Java or Java compatible Runtime
In this case you will likely want openjdk-6-jre to provide a runtime environment, and possibly openjdk-6-jdk to provide a development environment. You can often find the names of packages from Debian's wiki or from just searching on google as well.
Once you have the package name you can use apt-get to install the package and any dependencies. This assumes you have a network connection to the internet.
apt-get install openjdk-6-jre
# You can also chain packages to be installed
apt-get install openjdk-6-jre nano vim mplayer
For more information on using apt-get refer to Debian's documentation here.
Setting up SSH
On our boards we include the Debian package for openssh-server, but we remove the automatically generated keys for security reasons. To regenerate these keys:
dpkg-reconfigure openssh-server
Make sure your board is configured properly on the network, and set a password for your remote user. SSH will not allow remote connections without a password or a shared key.
| Note: | Setting up a password for root is only feasible on the uSD image. |
passwd root
You should now be able to connect from a remote Linux or OSX system using "ssh" or from Windows using a client such as putty.
| Note: | If your intended application does not have a DNS source on the target network, it can save login time to add "UseDNS no" in /etc/ssh/sshd_config. |
Starting Automatically
From Debian the most straightforward way to add your application to startup is to create a startup script. This is an example simple startup script that will toggle the red led on during startup, and off during shutdown. In this case I'll name the file customstartup, but you can replace this with your application name as well.
Edit the file /etc/init.d/customstartup to contain this:
 #! /bin/sh
 # /etc/init.d/customstartup

 case "$1" in
   start)
     /path/to/your/application
     ## If you are launching a daemon or other long running processes
     ## this should be started with
     # nohup /usr/local/bin/yourdaemon &
     ;;
   stop)
     # if you have anything that needs to run on shutdown
     /path/to/your/shutdown/scripts
     ;;
   *)
     echo "Usage: customstartup start|stop" >&2
     exit 3
     ;;
 esac

 exit 0
| Note: | The $PATH variable is not set up by default in init scripts so this will either need to be done manually or the full path to your application must be included. |
To make this run during startup and shutdown:
update-rc.d customstartup defaults
To manually start and stop the script:
/etc/init.d/customstartup start
/etc/init.d/customstartup stop
While this is useful for headless applications, if you are using X11 you should modify "/usr/bin/default-x-session":
#!/bin/sh

export HOME=/root/
export ICEWM_PRIVCFG=/mnt/root/root/.icewm/

icewm-lite &

while ! xprop -root | grep -q _NET_SUPPORTING_WM_CHECK
do
    sleep 0.1
done

exec /usr/bin/fullscreen-webkit http://127.0.0.1
Replace fullscreen-webkit with your own graphical application.
Backup / Restore
todo
MicroSD Card
todo
Software Development
Accessing Hardware Registers
Cross Compiling
Compile the Kernel
For adding new support to the kernel, or recompiling with more specific options you will need to have an X86 compatible Linux host available that can handle the cross compiling. Compiling the kernel on the board is not supported or recommended. Before building the kernel you will need to install a few support libraries on your workstation:
Prerequisites
RHEL/Fedora/CentOS:
yum install ncurses-devel ncurses
yum groupinstall "Development Tools" "Development Libraries"
Ubuntu/Debian:
sudo apt-get install build-essential libncurses5-dev libncursesw5-dev git
## If you are on a 64-bit system then 32-bit libraries will be required for the toolchain
# sudo apt-get install ia32-libs
For other distributions, please refer to their documentation to find equivalent tools.
Download sources and configure
git clone https://github.com/embeddedarm/linux-2.6.35.3-imx28.git

# This sets up the default configuration that we ship with for the TS-471x
make ts7600_defconfig
Once you have the configuration ready you can make your changes to the kernel. Commonly a reason for recompiling is to add support that was not built into the standard image's kernel. You can get a menu to browse available options by running:
make menuconfig
You can use the "/" key to search for specific terms through the kernel.
Build the kernel
Once you have it configured you can begin building the kernel. This usually takes about 5-10 minutes.
make
Install the Kernel and Modules
Next you need to install the kernel and modules to the SD card. Freescale uses a specialized booting mechanism for their processor, so to simplify installation we provide a script to handle installation as well as building/installing wireless-compat.
For example, if your workstation's SD card is /dev/mmcblk0:
sudo ./install_to_sd /dev/mmcblk0p
## or sdb
# sudo ./install_to_sd /dev/sdb
Features
CPU
This board features the i.MX283 454MHz ARM9 from Freescale. For more information about the processor and it's included peripherals, refer to the cpu manual.
FPGA
todo
FPGA Bitstreams
todo
FPGA Programming
todo
NBUS (FPGA to CPU connection)
This CPU uses a NAND bus to access the FPGA registers. Since this is not an atomic access, we have created the NBUS to allow applications to safely share access to FPGA resources.
Example NBUS application
When writing applications that should communicate over the NBUS you should use the calls in nbus.c and nbus.h. These will compile for c/c++ but if you are using another language such as Java or Python the best implementation is typically to write your hardware accesses in C, and use your languages popen/system() calls to execute the application handling NBUS calls.
All of the registers used in this example code are documented in the #Syscon.
#include <stdio.h>
#include <stdint.h>
#include <unistd.h>
#include "nbus.h"

int main (int argc, char **argv)
{
	uint16_t val;
	int i;
	nbuslock();

	//// Set DIO 7 low
	// Set output value to 0
	val = nbuspeek16(0xa);
	nbuspoke16(0xa, val & ~(1 << 7));
	// Set dio 7 direction to output
	val = nbuspeek16(0xc);
	nbuspoke16(0xc, val | (1 << 7));

	//// Set DIO 7 high
	// DDR is already set to output, so
	// set output value
	val = nbuspeek16(0xa);
	nbuspoke16(0xa, val | (1 << 7));

	//// Toggle Red LED 10 times
	val = nbuspeek16(0x2);
	for(i = 0; i < 10; i++) {
		// The first time this is called in the loop
		// the NBUS lock is already acquired, but will is safe
		// to call if you already have the lock
		nbuslock();
		if(i % 2) {
			nbuspoke16(0x2, val & ~(1 << 14));
		} else {
			nbuspoke16(0x2, val | ( 1 << 14));
		}
		// The NBUS lock should be held as little as possible
		// since other peripherals will need access.  When
		// going into an operation like a sleep, a flush, or
		// any other syscal that will stall the system without
		// actually needing the lock, it should be released first.
		nbusunlock();
		sleep(1);
	}

	return 0;
}
XUARTs
The XUART controller is a core we have included in the FPGA, as well as a userspace application called xuartctl for accessing these UARTs. Rather than using a kernel driver with the standard serial interface, we have implemented the XUARTs with features to simplify application development. The XUARTs allow you to easily use arbitrary baud rates, nonstandard modes such as DMX or 9n1, and they allow a very low latency operation. The XUART layer also uses the very low overhead TCP layer which allows you to transport serial over the network without writing any code.
The simplest example to get started is to define the port with:
xuartctl --server --port=1 --speed=115200
This will return "ttyname=/dev/pts/0", or a higher pts number. You can use this /dev/pts/# device to access the UART, but note that the pts device number can change based on other ssh, telnet or other processes. See this section for a sample script to setup the XUARTs with a predictable device name.
For more information and detailed usage, see the xuartctl page.
| Name | Type | Location | TX Enable |
|---|---|---|---|
| ttyS0 | TTL | pins 7 (TX) and 8 (RX) of the ##44 Pin Header. | N/A |
| XUART0 | TTL | pins 5 (TX) and 6 (RX) of the #44 Pin Header. | N/A |
| XUART1 | TTL | pins 19 (TX) and 20 (RX) of the #44 Pin Header. | pin 27 of the #44 Pin Header |
| XUART2 | TTL | pins 21 (TX) and 22 (RX) of the #44 Pin Header | pin 28 of the #44 Pin Header |
| XUART3 | TTL | pins 23 (TX) and 24 (RX) of the #44 Pin Header | N/A |
| XUART4 | TTL | pin 25 (TX) and 26 (RX) on the #44 Pin Header | N/A |
| XUART5 | TTL | pin 31 (TX) and 32 (RX) on the #44 Pin Header | pin 29 of the #44 Pin Header |
| XUART6 | TTL | pin 34 (RX) and 33 (TX) on the #44 Pin Header | pin 30 of the #44 Pin Header |
| XUART7 | TTL | pin 36 (RX) and 35 (TX on the #44 Pin Header | N/A |
Battery Backed RTC and Temperature Sensor
The TS-7600 features a temperature compensating RTC which maintains 0.5ppm between -20C to 70C. This is accessed in software using tshwctl. By default, tshwctl will run "tshwctl --getrtc" on startup which will pull system time from the RTC, and set the system time. During the Technologic Systems production process the RTC will be programmed with an accurate time.
If time ever needs to be set you can run:
tshwctl --setrtc
This will take the system time and write it to the RTC. The battery in the RTC will last approximately 10 years for most applications, but the RTC allows you to see when the battery reaches low or critical voltages:
# tshwctl --rtcinfo
rtc_present=1
rtctemp_millicelsius=36000
rtcinfo_oscillator_ok=1
rtcinfo_batt_low=0
rtcinfo_batt_crit=0
rtcinfo_firstpoweroff=0000000000
rtcinfo_lastpoweron=0000000000
COM Ports
The XUART ports will be controlled with xuartctl. By default they will not have devices in /dev/.
| Name | Type | Location |
|---|---|---|
| ttyS0 (console) | TTL | pins 7 (TX) and 8 (RX) of the #44 Pin Header. |
| XUART0 | TTL | pins 5 (TX) and 6 (RX) of the #44 Pin Header. |
| XUART1 | TTL | pins 19 (TX), 20 (RX), and 27 (TXEN) of the #44 Pin Header. |
| XUART2 | TTL | pins 21 (TX), 22 (RX), and 28 (TXEN) of the #44 Pin Header. |
| XUART3 | TTL | pins 23 (TX) and 24 (RX) of the #44 Pin Header. |
| XUART4 | TTL | pins 25 (TX) and 26 (RX) of the #44 Pin Header. |
| XUART5 | TTL | pins 31 (TX), 32 (RX), and 29 (TXEN) of the #44 Pin Header. |
| XUART6 | TTL | pins 34 (TX), 33 (RX), and 30 (TXEN) of the #44 Pin Header. |
| XUART7 | TTL | pins 36 (TX) and 35 (RX) of the #44 Pin Header. |
| Note: | Refer to the TS-752 page if using the development baseboard. |
SD
todo
SPI Flash
todo
CAN
| Note: | The default TS-7600 bitstream does not include CAN. See the #FPGA Bitstreams section for more information on bitstreams including CAN. |
Syscon
| Offset | Bits | Usage |
|---|---|---|
| 0x0 | 15:0 | Model ID: Reads 0x7600 |
| 0x2 | 15 | Green LED (1 - on) |
| 14 | Red LED (1 - on) | |
| 13-12 | Scratch Reg | |
| 11 | Reset Switch Enable (1 - reboot when dio9 low) | |
| 10 | Reserved latched mode3 value | |
| 9 | Reserved latched mode2 value | |
| 8 | Reserved latched mode1 value | |
| 7-4 | Board Submodel (0x0 on production units) | |
| 3:0 | FPGA revision | |
| 0x4 | 15:0 | Random data changed every 1 second |
| 0x6 | 15-4 | Reserved |
| 3 | Lattice tagmem clock | |
| 2 | Lattice tagmem serial in | |
| 1 | Lattice tagmem CSn | |
| 0 | Lattice tagmem serial out | |
| 0x8 | 15:0 | DIO 15:0 input data |
| 0xa | 15:0 | DIO 15:0 output data |
| 0xc | 15:0 | DIO 15:0 data direction (1 - output) |
| 0xe | 15:0 | DIO 31:16 input data |
| 0x10 | 15:0 | DIO 31:16 output data |
| 0x12 | 15:0 | DIO 31:16 data direction (1 - output) |
| 0x14 | 15:0 | DIO 47:32 input data |
| 0x16 | 15:0 | DIO 47:32 output data |
| 0x18 | 15:0 | DIO 47:32 data direction (1 - output) |
| 0x1a | 15:0 | DIO 63:48 input data |
| 0x1c | 15:0 | DIO 63:48 output data |
| 0x1e | 15:0 | DIO 53:48 data direction (1 - output) |
| 0x20 | 15:9 | Reserved |
| 8:6 | DIO 66:64 input data | |
| 5:3 | DIO 66:64 output data | |
| 2:0 | DIO 66:64 data direction (1 - output) | |
| 0x22 | 15:0 | #Watchdog |
Watchdog
The TS-7600 creates a /dev/watchdog with the tshwctl daemon running at the highest possible priority to feed the watchdog. This is a pipe that is created in userspace, so for many applications this may provide enough functionality for the watchdog by verifying that userspace is still executing applications. If you would like to have the watchdog functionality more tightly integrated with your application you can specify various feed options.
At the lower level there are 3 valid watchdog feed values that are written to the watchdog register in the #Syscon:
| Value | Result |
|---|---|
| 0 | feed watchdog for another .338s |
| 1 | feed watchdog for another 2.706s |
| 2 | feed watchdog for another 10.824s |
| 3 | disable watchdog |
The watchdog is armed by default for 10s for the operating system to take over, after which the startup scripts autofeed the watchdog with:
echo a2 > /dev/watchdog
The /dev/watchdog accepts 3 types of commands:
| Value | Function |
|---|---|
| f<3 digits> | One time feed for a specified amount of time which uses the 3 digit number / 10. For example, "f456" would feed for 45.6 seconds. |
| "0", "1", "2", "3" | One time feed with the value in the above table. |
| a<num 0-3> | This value autofeeds with the value in the above table. |
Most applications should use the f<3 digits> option to more tightly integrate this to their application. For example:
#include <stdio.h>
#include <fcntl.h>
#include <unistd.h>

void do_some_work(int data) {
	/* The contract for sleep(int n) is that it will sleep for at least n
	 * seconds, but not less.  If other kernel threads or processes require
	 * more time sleep can take longer, but when your process has a high
	 * priority this is usually measured in millseconds */
	sleep(5);
}

int read_some_io() {
	/* If this function (or do_some_work) misbehave and stall thee watchdog
         * will not be fed in the main loop and cause a reboot.  You can test
         * this by uncommenting the next line to force an infinite loop */
	// while (1) {}
	return 42;
}

int main(int argc, char **argv)
{
	int wdfd;
	/* In languages other than C/C++ this is still essentially the same, but
	 * make sure you are opening the watchdog file synchronously so the writes
	 * happen immediately.  Many languages will buffer writes together to make
	 * them more efficient, but the watchdog needs the writes to be timed
	 * precisely */
	wdfd = open("/dev/watchdog", O_SYNC|O_RDWR);

	while (1) {
		int data;
		/* This loop is expected to take about 5-6 seconds, but to allow some
		 * headroom for other applications, I will feed the watchdog for 10s. */
		write(wdfd, "f100", 4);

		data = read_some_io();
		do_some_work(data);
	}
}
DIO
todo
| DIO Number | Location | Alternate Function |
|---|
Random Number Generator
Because many embedded systems do not have much entropy, we have included a core in the FPGA with a random number generator. On startup, tshwctl is called with the --setrng option to seed Linux's random number generator from the hardware random number generator. Without a good source of entropy, Linux's random number generator will start up in a very predictable state which is undesirable for the security of many cryptography protocols.
Interrupts
I2C
todo
SPI
todo
External Reset
Driving the external reset pin (DIO 9) low will reset the CPU by default. You can disable this functionality by running:
tshwctl --resetswitchoff
Connectors
44 Pin Header
On our development baseboard the 4 JTAG pins are left hanging. The CN-PC104-40PIN-F is available as a mating connector to this header.
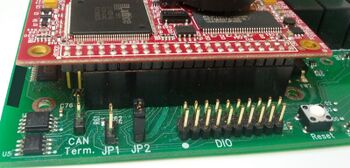
All pins labelled DIO are coming directly off of the FPGA and are rated for 3.3V, and can sink or source 12mA.
|
|
- ↑ 1.0 1.1 1.2 1.3 These pins are used for factory programming only. There is a software mechanism for soft reloading the FPGA documented here.
- ↑ This 3.3V rail can be used to power external peripherals with up to 500mA of current
- ↑ 3.0 3.1 3.2 3.3 The POE pins are the signal pairs from the ethernet connector which are required for a power over ethernet implementation. See the TS-752 baseboard schematic for an example implementation.
26 Pin Header
All pins labelled DIO are coming directly off of the FPGA and are rated for 3.3V, and can sink or source 12mA.
|
|
TS-752
See the TS-752 page for more information on the other available connectors.
Product Notes
FCC Advisory
This equipment generates, uses, and can radiate radio frequency energy and if not installed and used properly (that is, in strict accordance with the manufacturer's instructions), may cause interference to radio and television reception. It has been type tested and found to comply with the limits for a Class A digital device in accordance with the specifications in Part 15 of FCC Rules, which are designed to provide reasonable protection against such interference when operated in a commercial environment. Operation of this equipment in a residential area is likely to cause interference, in which case the owner will be required to correct the interference at his own expense.
If this equipment does cause interference, which can be determined by turning the unit on and off, the user is encouraged to try the following measures to correct the interference:
Reorient the receiving antenna. Relocate the unit with respect to the receiver. Plug the unit into a different outlet so that the unit and receiver are on different branch circuits. Ensure that mounting screws and connector attachment screws are tightly secured. Ensure that good quality, shielded, and grounded cables are used for all data communications. If necessary, the user should consult the dealer or an experienced radio/television technician for additional suggestions. The following booklets prepared by the Federal Communications Commission (FCC) may also prove helpful:
How to Identify and Resolve Radio-TV Interference Problems (Stock No. 004-000-000345-4) Interface Handbook (Stock No. 004-000-004505-7) These booklets may be purchased from the Superintendent of Documents, U.S. Government Printing Office, Washington, DC 20402.
Limited Warranty
See our Terms and Conditions for more details.
