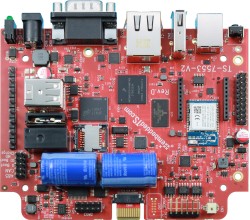
TS-7553-V2 Software Manual Master Test
 | |
| Product Page | |
| Documentation | |
|---|---|
| Schematic | |
| Mechanical Drawing | |
| FTP Path | |
| Processor | |
| NXP i.MX6UL | |
| 528MHz or 696MHz Arm® Cortex®-A7 | |
| i.MX6UL Product Page |
Getting Started
A Linux workstation is recommended and assumed for development using this documentation. For users in Windows or OSX, we recommend virtualizing Linux. Most of our platforms run Debian, which is recommended for ease of use if there is no personal distribution preference.
Virtualization
Suggested Linux Distributions
Development using a Windows or OSX system may be possible but is not supported. Development will include accessing drives formatted for Linux and often Linux-based tools.
First Linux Boot
| WARNING: | Be sure to take appropriate Electrostatic Discharge (ESD) precautions. Disconnect the power source before moving, cabling, or performing any set up procedures. Inappropriate handling may cause damage to the board. |
The TS-7553-V2 has an input voltage range of 5 V to 28 V DC through the main power connector which offers screw terminals for secure wiring or a barrel jack. Please note that while the TS-ENC820 endcap lists "5V-12V", the input voltage range is still 5 V to 28 V DC with the unit in the enclosure. See the P1 pin header diagram for screw terminal power locations. See the CN6 Barrel Jack section for details about the coaxial power connector.
The TS-7553-V2 will require approximately 1 W at idle. An ideal power supply for the TS-7553-V2 will allow up to 5 W to power additional peripherals without issue. See the Specifications section for more information on power input.
Once power has been applied, output will be available on the serial console. The next section of the manual provides information on getting the console port set up. The first output is from the bootrom and will look like the following:
U-Boot 2016.03-00305-g75344a5 (Dec 15 2017 - 13:53:14 -0800)

CPU:   Freescale i.MX6UL rev1.1 at 396 MHz
Reset cause: POR
Board: Technologic Systems TS-7553-V2
I2C:   ready
DRAM:  512 MiB
MMC:   FSL_SDHC: 0, FSL_SDHC: 1
*** Warning - bad CRC, using default environment

Net:   FEC0 [PRIME]
Booting from the SD card ...
** File not found /boot/boot.ub **
34511 bytes read in 162 ms (208 KiB/s)
5460520 bytes read in 391 ms (13.3 MiB/s)
NO CHRG jumper is set, not waiting
Kernel image @ 0x80800000 [ 0x000000 - 0x535228 ]
## Flattened Device Tree blob at 83000000
   Booting using the fdt blob at 0x83000000
   Using Device Tree in place at 83000000, end 8300b6ce

Starting kernel ...


Welcome to Debian GNU/Linux 8 (jessie)!

[ SKIP ] Ordering cycle found, skipping D-Bus System Message Bus Socket
         Expecting device dev-ttymxc0.device...
[  OK  ] Reached target Remote File Systems (Pre).
...
[  OK  ] Started Update UTMP about System Runlevel Changes.

Debian GNU/Linux 8 ts-imx6ul ttymxc0

ts-imx6ul login:
The U-Boot build date reflects when U-Boot was built and serves as a revision indicator. A change to the kernel or filesystem will not affect this date.
Connect USB Console
Serial Console
The TS-7553-V2 includes a USB type B device port which uses a 8051 based microcontroller to create a serial device on a host PC. The serial console is provided through this port at 115200 baud, 8n1, with no flow control. The USB serial device is a CP210x Virtual COM Port. Most operating systems have built-in support for this device. If not however, drivers are available for the device here.

Note that this port can also be internally switched to connect to the CPU as a USB OTG/Gadget port.
Console from Linux
There are many serial terminal applications for Linux, three common used applications are picocom, screen, and minicom. These examples demonstrate all three applications and assume that the serial device is "/dev/ttyUSB0" which is common for USB adapters. Be sure to replace the serial device string with that of the device on your workstation.
picocom is a very small and simple client.
sudo picocom -b 115200 /dev/ttyUSB0
screen is a terminal multiplexer which happens to have serial support.
sudo screen /dev/ttyUSB0 115200
Or a very commonly used client is minicom which is quite powerful but requires some setup:
sudo minicom -s
- Navigate to 'serial port setup'
- Type "a" and change location of serial device to "/dev/ttyUSB0" then hit "enter"
- If needed, modify the settings to match this and hit "esc" when done:
     E - Bps/Par/Bits          : 115200 8N1
     F - Hardware Flow Control : No
     G - Software Flow Control : No
- Navigate to 'Save setup as dfl', hit "enter", and then "esc"
Console from Windows
Putty is a small simple client available for download here. Open up Device Manager to determine your console port. See the putty configuration image for more details.


U-Boot
This platform includes U-Boot as the bootloader to load and boot the full operating system. The i.MX6UL processor loads U-Boot from the eMMC flash at power-on. U-Boot allows booting images from the microSD, eMMC, NFS, or USB. U-Boot is a general purpose bootloader that is capable of booting into common Linux distributions, Android, QNX, or others.
On a normal boot, output from U-Boot will be similar to the following:
U-Boot 2016.03-00305-g75344a5 (Dec 15 2017 - 13:53:14 -0800)

CPU:   Freescale i.MX6UL rev1.1 at 396 MHz
Reset cause: WDOG
Board: Technologic Systems TS-7553-V2
I2C:   ready
DRAM:  512 MiB
MMC:   FSL_SDHC: 0, FSL_SDHC: 1
Net:   FEC0 [PRIME]
Booting from the SD card ...
** File not found /boot/boot.ub **
34511 bytes read in 162 ms (208 KiB/s)
5460520 bytes read in 391 ms (13.3 MiB/s)
NO CHRG jumper is set, not waiting
Kernel image @ 0x80800000 [ 0x000000 - 0x535228 ]
## Flattened Device Tree blob at 83000000
   Booting using the fdt blob at 0x83000000
   Using Device Tree in place at 83000000, end 8300b6ce

Starting kernel ...
By default the board will boot to SD or eMMC depending on the status of the "SD Boot" jumper on startup.
Entering U-Boot shell
The U-Boot shell is a powerful tool. It allows modification of the environment, as well as the ability to run commands directly. By default, there are two ways to enter the shell: Set the U-Boot jumper, or press and hold the Push Switch before applying power and hold it for 5 seconds. When entering the U-Boot shell, it will attempt to run a script on a USB mass storage device before finally dropping to the shell.
The reset switch is provided as a convenience, so U-Boot can be entered without having to open any kind of enclosure. It can also be disabled for security purposes. Even if the switch is disabled, the U-Boot shell can still be accessed by using the U-Boot jumper.
To disable the press-and-hold method of entering the U-Boot shell, use the following U-Boot commands:
env set rstuboot 0
env save
By setting the env var, rstuboot, to a 1, the push-and-hold method can be re-enabled.
U-Boot Environment
The eMMC flash contains both the U-Boot executable binary and U-Boot environment. Our default build has 2 MiB of environment space which can be used for variables and boot scripts. The following commands are examples of how to manipulate the U-Boot environment:
# Print all environment variables
env print -a

# Sets the variable bootdelay to 5 seconds
env set bootdelay 5;

# Variables can also contain commands
env set hellocmd 'led red on; echo Hello world; led green on;'

# Execute commands saved in a variable
env run hellocmd;

# Commit environment changes to the SPI flash
# Otherwise changes are lost
env save

# Restore environment to default
env default -a

# Remove a variable
env delete emmcboot
U-Boot Commands
# The most important command is
help
# This can also be used to see more information on a specific command
help i2c

# This is a command added to U-Boot by TS to read the baseboard ID on our
# System on Module devices
bbdetect
echo ${baseboard} ${baseboardid}
# The echo will return something similar to:
# TS-8390 2

# Boots into the binary at $loadaddr.  The loaded file needs to have
# the U-Boot header from mkimage.  A uImage already contains this.
bootm
# Boots into the binary at $loadaddr, skips the initrd, specifies
# the FDT addrress so Linux knows where to find the device tree
bootm ${loadaddr} - ${fdtaddr}

# Boot a Linux zImage loaded at $loadaddr
bootz
# Boot in to a Linux zImage at $loadaddr, skip initrd, specifies
# the FDT address to Linux knows where to find the device tree
bootz ${loadaddr} - ${fdtaddr}

# Get a DHCP address
dhcp
# This sets ${ipaddr}, ${dnsip}, ${gatewayip}, ${netmask}
# and ${ip_dyn} which can be used to check if the dhcp was successful

# These commands are used for scripting:
false # do nothing, unsuccessfully
true # do nothing, successfully

# This command can set fuses in the processor
# Setting fuses can brick the unit, will void the warranty,
# and should not be done in most cases
fuse

# GPIO can be manipulated from U-Boot.  Keep in mind that the IOMUX
# in U-Boot is only setup enough to boot the device, so not all pins will
# be set to GPIO mode out of the box.  Boot to the full operating system
# for more GPIO support.
# GPIO are specified in bank and IO in this manual.  U-Boot uses a flat numberspace,
# so for bank 2 DIO 25, this would be number (32*1)+25=89
# The formula thus being (32*(bank-1)+dio)=flattened_dio
# Note that on some products, bank 1 is the first bank
# Set 2_25 low
gpio clear 83
# Set 2_25 high
gpio set 83
# Read 2_25
gpio input 83

# Control LEDs
led red on
led green on
led all off
led red toggle

# This command is used to copy a file from most devices
# Load kernel from SD
load mmc 0:1 ${loadaddr} /boot/uImage
# Load Kernel from eMMC
load mmc 1:1 ${loadaddr} /boot/uImage
# Load kernel from USB
usb start
load usb 0:1 ${loadaddr} /boot/uImage
# Load kernel from SATA
sata init
load sata 0:1 ${loadaddr} /boot/uImage

# View the FDT from U-Boot
load mmc 0:1 ${fdtaddr} /boot/imx6q-ts4900.dtb
fdt addr ${fdtaddr}
fdt print

# It is possible to blindly jump to any memory location
# This is similar to bootm, but it does not require
# the use of the U-Boot header
load mmc 0:1 ${loadaddr} /boot/custombinary
go ${loadaddr}

# Browse fat, ext2, ext3, or ext4 filesystems:
ls mmc 0:1 /

# Access memory like devmem in Linux, read/write arbitrary memory
# using mw and md
# write
mw 0x10000000 0xc0ffee00 1
# read
md 0x10000000 1

# Test memory.
mtest

# Check for new SD card
mmc rescan
# Read SD card size
mmc dev 0
mmcinfo
# Read eMMC Size
mmc dev 1
mmcinfo

# The NFS command is like 'load', but used over the network
dhcp
env set serverip 192.168.0.11
nfs ${loadaddr} 192.168.0.11:/path/to/somefile

# Test ICMP
dhcp
ping 192.168.0.11

# Reboot
reset

# SPI access is through the SF command
# Be careful with sf commands since
# this is where U-Boot and the FPGA bitstream exist
# Improper use can render the board unbootable
sf probe

# Delay in seconds
sleep 10

# Load HUSH scripts that have been created with mkimage
load mmc 0:1 ${loadaddr} /boot/ubootscript
source ${loadaddr}

# Most commands have return values that can be used to test
# success, and HUSH scripting supports comparisons like
# test in Bash, but much more minimal
if load mmc 1:1 ${fdtaddr} /boot/uImage;
	then echo Loaded Kernel
else
	echo Could not find kernel
fi

# Commands can be timed with "time"
time sf probe

# Print U-Boot version/build information
version
Modify Linux Kernel cmdline
The Linux kernel cmdline can be customized by modifying the cmdline_append variable. If new arguments are added, the existing value should also be included with the new arguments.
env set cmdline_append rw rootwait console=ttymxc0,115200 quiet
env save
The kernel command line can also be modified from from the onboard Linux. From the linux shell prompt run the following commands to install the necessary tools and create the script:
apt-get update && apt-get install u-boot-tools -y
echo "env set cmdline_append rw rootwait console=ttymxc0,115200 quiet" > /boot/boot.scr
mkimage -A arm -T script -C none -n 'tsimx6ul boot script' -d /boot/boot.scr /boot/boot.ub
The boot.scr includes the plain text commands to be run in U-Boot on startup. The mkimage tool adds a checksum and header to this file which can be loaded by U-Boot. The .ub file should not be edited directly.
Booting From NFS
U-Boot's NFS support can be used to load a kernel, device tree binary, and root filesystem. The default scripts include an example NFS boot script. Because of the way U-Boot tries to infer server data, the script we use will bypass this, making it more straightforward to use an NFS root that will not be heavily dependent on a particular network configuration.
# Set this to your NFS server IP and NFS directory path
env set nfsroot 192.168.0.1:/path/to/nfs/rootfs/
env save
To boot your NFS root:
# Boot to NFS once
run nfsboot;

# To make the NFS boot the persistent default
env set bootcmd run nfsboot;
env save
| Note: | If 'bootcmd' is used to test for whether the system should stop at the U-Boot shell or continue, the above will make it difficult to get back to the U-Boot shell as it will always attempt to boot regardless of jumper status. |
Booting From USB
By default, U-Boot will attempt to read a U-Boot script from a USB drive when the U-Boot jumper is set (or the reset button is enabled and depressed). It copies /tsinit.ub into memory and jumps in to the script. To make a bootable drive, create a single ext4 partition on a USB drive and unpack the rootfs tarball located here
The one addition is to create the tsinit.ub file in the root of the USB drive. In order to do this, a U-Boot script must be created and then converted to the .ub format. This process requires a set of U-Boot specific tools. These are available on most every linux distribution, the instructions below are for Debian, either run on a host PC or on the device itself. See the package installation documentation for other respective distributions.
Install U-Boot tools in Debian
apt-get update && apt-get install u-boot-tools -y
Create the file tsinit.scr in the root of the USB drive with the linux filesystem:
# Prepare with:
# mkimage -A arm -T script -C none -n 'ts7553v2 usb' -d tsinit.scr tsinit.ub

# DO NOT MANUALLY EDIT THE .UB FILE

load usb 0:1 ${fdtaddr} /boot/imx6ul-ts7553v2${variant}.dtb;

load usb 0:1 ${loadaddr} /boot/zImage;

setenv bootargs root=/dev/sda1 ${cmdline_append};
bootz ${loadaddr} - ${fdtaddr};
Then in the same directory generate the tsinit.ub file:
mkimage -A arm -T script -C none -n 'ts7553v2 usb' -d tsinit.scr tsinit.ub
Update U-Boot
| WARNING: | Installing a custom U-Boot is not recommended and may cause the device to fail to boot. |
The latest U-Boot binary can be downloaded from the TS-7553-V2 FTP site. Copy this file to /boot/u-boot.imx on the 1st partition of the SD card. The U-Boot binary can be updated by inserting that SD card in to the TS-7553-V2, setting the U-Boot and SD card jumpers, and powering up the unit. At the U-Boot prompt, the following command can be used:
run update-uboot
The above script will use the /boot/u-boot.imx file from the SD card or eMMC, depending on the state of the SD Boot jumper.
U-Boot Development
We do provide our U-Boot sources, but we do not recommend rebuilding a custom U-Boot binary as it can leave the system in an unbootable state.
If you still want to proceed with building a custom U-Boot, use the "tsimx_v2016.03_4.1.15_2.0.0_ga" branch from the github here: https://github.com/embeddedTS/u-boot-imx
When compiling, we recommend using ONLY this cross-compiler, the use of any other compiler may cause issues. Specifically, we have experienced RAM problems when using a more recent cross compiler to build this version of U-Boot. The use of any other compiler may leave the system in an unbootable state!
export ARCH=arm
export CROSS_COMPILE=/path/to/folder/bin/arm-tsimx6ul-linux-gnueabihf-

make ts7553v2_defconfig
make u-boot.imx
This will output a u-boot.imx that can be written to the device using the steps in Update U-Boot.
POST
The TS-7553-V2 includes a simple POST test. This is normally used in production to verify basic functionality rapidly before doing more thorough testing. By default, this is not enabled on every boot, but it can be added via U-Boot scripting if there is a need for additional confidence in the application. The POST test quickly verifies basic functionality of: USB, RTC, Ethernet PHY, FRAM (if present), WiFi/BT module (if present), eMMC (see warning below), RAM, and the supervisory microcontroller.
The post test can be run with the following command in U-Boot:
post
| WARNING: | The 'post' command has an optional "-d" argument; when this argument is passed it does a write and readback test of the eMMC and FRAM which is DESTRUCTIVE to the data on the disk! Note that it will not modify the boot sector contents of the eMMC. The eMMC chip is still tested for basic functionality without the argument passed, but no data is read or written from the disk itself. |
Debian
For development, it is recommended to work directly in Debian on the SD card. Debian provides many more packages and a much more familiar environment for users already versed in Debian. Through Debian it is possible to configure the network, use the 'apt-get' suite to manage packages, and perform other configuration tasks. Out of the box the Debian distribution does not have any default username/password set. The account "root" is set up with no password configured. It is possible to log in via the serial console without a password but many services such as ssh will require a password set or will not allow root login at all. It is advised to set a root password and create a user account when the unit is first booted.
| Note: | Setting up a password for root is only feasible on the uSD image. |
It is also possible to cross compile applications. Using a Debian host system will allow for installing a cross compiler to build applications. The advantage of using a Debian host system comes from compiling against libraries. Debian cross platform support allows one to install the necessary development libraries on the host, building the application on the host, and simply installing the runtime libraries on the target device. The library versions will be the same and completely compatible with each other. See the respective Debian cross compiling section for more information.
Debian Jessie(8)
Getting Started
The stock image uses a Debian Jessie distribution and Linux kernel version 4.1.15. The latest image can be downloaded below.
This image can then be written to a microSD card or the on-board eMMC flash in order to be booted on the TS-7553-V2.
Configuring the Network
From almost any Linux system you can use 'ip' command or the 'ifconfig' and 'route' commands to initially set up the network.
# Bring up the CPU network interface
ifconfig eth0 up

# Or if you're on a baseboard with a second ethernet port, you can use that as:
ifconfig eth1 up

# Set an ip address (assumes 255.255.255.0 subnet mask)
ifconfig eth0 192.168.0.50

# Set a specific subnet
ifconfig eth0 192.168.0.50 netmask 255.255.0.0

# Configure your route.  This is the server that provides your internet connection.
route add default gw 192.168.0.1

# Edit /etc/resolv.conf for your DNS server
echo "nameserver 192.168.0.1" > /etc/resolv.conf
Most networks will offer a DHCP server, an IP address can be obtained from a server with a single command in linux:
Configure DHCP in Debian:
# To setup the default CPU ethernet port
dhclient eth0
# Or if you're on a baseboard with a second ethernet port, you can use that as:
dhclient eth1
# You can configure all ethernet ports for a dhcp response with
dhclient
Systemd provides a networking configuration option to allow for automatic configuration on startup. Systemd-networkd has a number of different configuration files, some of the default examples and setup steps are outlined below.
/etc/systemd/network/eth.network
[Match]
Name=eth*

[Network]
DHCP=yes
To use DHCP to configure DNS via systemd, start and enable the network name resolver service, systemd-resolved:
systemctl start systemd-resolved.service
systemctl enable systemd-resolved.service
ln -s /run/systemd/resolve/resolv.conf /etc/resolv.conf
For a static config create a network configuration for that specific interface.
/etc/systemd/network/eth0.network
[Match]
Name=eth0

[Network]
Address=192.168.0.50/24
Gateway=192.168.0.1
DNS=192.168.0.1
For more information on networking, see Debian and systemd's documentation:
Wi-Fi Client
| Note: | The latest image for this platform as of April 28th, 2022 has known issues with the Wi-Fi driver due to incompatibility with cfg80211 powersave modes.
If using Wi-Fi, it is strongly recommended to bring up the Wi-Fi interface, and then run This issue will be addressed in future images and has already been addressed in our kernel sources. We will continue to provide updates as we receive them from the Wi-Fi module manufacturer. |
If connecting to a WPA/WPA2 network, a wpa_supplicant config file must first be created:
wpa_passphrase yournetwork yournetworkpassphrase > /etc/wpa_supplicant/wpa_supplicant-wlan0.conf
Create the file /lib/systemd/system/wpa_supplicant@.service with these contents
[Unit]
Description=WPA supplicant daemon (interface-specific version)
Requires=sys-subsystem-net-devices-%i.device
After=sys-subsystem-net-devices-%i.device

[Service]
Type=simple
ExecStart=/sbin/wpa_supplicant -c/etc/wpa_supplicant/wpa_supplicant-%I.conf -i%I

[Install]
Alias=multi-user.target.wants/wpa_supplicant@%i.service
Create the file /etc/systemd/network/wlan0.network with:
[Match]
Name=wlan0

[Network]
DHCP=yes
See the systemctl-networkd example for setting a static IP for a network interface. The wlan0.network can be configured the same way as an eth.network.
To enable all of the changes that have been made, run the following commands:
systemctl enable wpa_supplicant@wlan0
systemctl start wpa_supplicant@wlan0
systemctl restart systemd-networkd
Host a Wi-Fi Access Point
| Note: | The latest image for this platform as of April 28th, 2022 has known issues with the Wi-Fi driver due to incompatibility with cfg80211 powersave modes.
If using Wi-Fi, it is strongly recommended to bring up the Wi-Fi interface, and then run This issue will be addressed in future images and has already been addressed in our kernel sources. We will continue to provide updates as we receive them from the Wi-Fi module manufacturer. |
This section will discuss setting up the WiFi device as an access point that is bridged to an ethernet port. That is, clients can connect to the AP and will be connected to the ethernet network through this network bridge. The ethernet network must provide a DHCP server; this will be passed through the bridge to WiFi client devices as they connect.
It is also possible to run a DHCP client on the platform itself. In this case the hostapd.conf file needs to be set up without bridging and a DHCP server needs to be configured. Refer to Debian's documentation for more details on DHCP server configuration.
The 'hostapd' utility is used to manage the access point of the device. This is usually installed by default, but can be installed with:
apt-get update && apt-get install hostapd -y
| Note: | The install process may start an unconfigured 'hostapd' process. This process must be killed before moving forward. |
Modify the file "/etc/hostapd/hostapd.conf" to have the following lines:
ssid=YourWiFiName
wpa_passphrase=Somepassphrase
interface=wlan0
channel=7
driver=nl80211
logger_stdout=-1
logger_stdout_level=2
wpa=2
wpa_key_mgmt=WPA-PSK
| Note: | Refer to the kernel's hostapd documentation for more wireless configuration options. |
The access point can be started and tested by hand:
hostapd /etc/hostapd/hostapd.conf
Systemd auto-start with bridge to eth0
It is possible to configure the auto-start of 'hostapd' through systemd. The configuration outlined below will set up a bridge with "eth0", meaning the Wi-Fi connection is directly connected to the ethernet network. The ethernet network is required to have a DHCP server present and active on it to assign Wi-Fi clients an IP address. This setup will allow Wi-Fi clients access to the same network as the ethernet port, and the bridge interface will allow the platform itself to access the network.
Set up hostapd
First, modify the hostapd configuration to understand the bridge interface:
echo "bridge=br0" >> /etc/hostapd/hostapd.conf
Create the file "/etc/systemd/system/hostapd_user.service" with the following contents:
[Unit]
Description=Hostapd IEEE 802.11 AP
Wants=network.target
Before=network.target
Before=network.service
After=sys-subsystem-net-devices-wlan0.device
After=sys-subsystem-net-devices-br0.device
BindsTo=sys-subsystem-net-devices-wlan0.device
BindsTo=sys-subsystem-net-devices-br0.device

[Service]
Type=forking
PIDFile=/run/hostapd.pid
ExecStart=/usr/sbin/hostapd /etc/hostapd/hostapd.conf -P /run/hostapd.pid -B

[Install]
WantedBy=multi-user.target
Then enable this in systemd:
systemctl enable hostapd_user.service
systemctl enable systemd-networkd
Set up bridging
Create the following files with the listed contents.
"/etc/systemd/network/br0.netdev"
[NetDev]
Name=br0
Kind=bridge
"/etc/systemd/network/br0.network"
[Match]
Name=br0

[Network]
DHCP=yes
"/etc/systemd/network/bridge.network"
[Match]
Name=eth0

[Network]
Bridge=br0
Wi-Fi Concurrent Client / Access Point
| Note: | The latest image for this platform as of April 28th, 2022 has known issues with the Wi-Fi driver due to incompatibility with cfg80211 powersave modes.
If using Wi-Fi, it is strongly recommended to bring up the Wi-Fi interface, and then run This issue will be addressed in future images and has already been addressed in our kernel sources. We will continue to provide updates as we receive them from the Wi-Fi module manufacturer. |
The Wi-Fi device on this platform supports concurrent operation of client and access point (STA and AP). Please see the "Wi-Fi Client" section above first to connect the Wi-Fi module, in STA mode, to an external AP. This demo showcases the Wi-Fi module starting its own AP mode via hostapd with a simple static IP address while also being concurrently connected to a separate AP.
The hostapd utility is used to manage the access point mode. This is usually installed by default, but can separately be installed with:
apt-get update && apt-get install hostapd -y
| Note: | The install process may start an unconfigured 'hostapd' process. This process must be killed before moving forward. |
Modify the file /etc/hostapd/hostapd.conf to have the following lines:
ssid=YourWiFiName
wpa_passphrase=Somepassphrase
interface=p2p0
auth_algs=3
channel=<channel>
driver=nl80211
logger_stdout=-1
logger_stdout_level=2
wpa=2
wpa_key_mgmt=WPA-PSK
| Note: | The channel used for AP must match the channel the STA is using! Be sure to set 'channel=...' in the above file to a proper channel number. |
| Note: | Refer to the kernel's hostapd documentation for more wireless configuration options. |
In order for the concurrent modes to work, a separate virtual wireless device must first be created. Note that hostapd.conf above lists interface=p2p0, a virtual interface with this name must be created:
iw wlan0 interface add p2p0 type managed
The access point can then be started and tested by hand:
hostapd /etc/hostapd/hostapd.conf &
An IP address can be set to p2p0:
ifconfig p2p0 192.168.0.1
From this point, other Wi-Fi clients can connect to the SSID YourWiFiName with the WPA2 key Somepassphrase with a static IP in the range of 192.168.0.0/24, and will be able to access the platform at 192.168.0.1. More advanced configurations are also possible, including bridging, routing/NAT, or simply separate networks with the Wi-Fi module connecting to a network and hosting its own private network with DHCP.
Cellular Data Network
DC-TS767-MT MultiTech Modem
The TS-7553-V2 includes support for the Multitech MTSMC-G2 or MTSMC-H5 connected via the TS-DC767-MT daughter card, which can connect to the internet using pppd. The modem is attached to the HD1 Header, also called the Daughter Card interface. The modem itself can be configured with the following commands:
ln -s /dev/ttymxc6 /dev/ttymultidc
There are two GPIO pins that can control reset and RTS of the cell modem. These two pins default to an I2C mode, so before they can be used, they must have the pinmux set to GPIO. This can be done with the following two commands:
peekpoke 32 0x20e0118 0x5  #Set RTS pin to GPIO, GPIO 69
peekpoke 32 0x20e011c 0x5  #Set reset pin to GPIO, GPIO 70
The DIO pins can be controlled now from the linux GPIO subsystem. In order to function properly, the RTS pin must be low, and the reset must be high. This can be done with the following commands:
echo "69" > /sys/class/gpio/export
echo "70" > /sys/class/gpio/export
echo "low" > /sys/class/gpio/gpio69/direction
echo "high" > /sys/class/gpio/gpio70/direction
The pppd application must be installed and any required modules loaded:
apt-get update && apt-get install -y ppp
This example is configured for T-Mobile in the US:
/etc/ppp/peers/tmobile
/dev/ttymultidc
noauth
115200
debug
usepeerdns
persist
defaultroute

connect "/usr/sbin/chat -v -f /etc/ppp/chatscripts/tmobile"
disconnect "/usr/sbin/chat -v -f /etc/ppp/chatscripts/tmobile-disconnect"
/etc/ppp/chatscripts/tmobile
TIMEOUT 10
ABORT 'BUSY'
ABORT 'NO ANSWER'
ABORT 'ERROR'

"" "\p\p\p\p\p\p\p\p\p\p\p\p+++\p\p\p\p\p\p\p\p\p\p\p\p"
"" "ATH0"

"OK" 'AT+CGDCONT=1,"IP","wap.voicestream.com"'

ABORT 'NO CARRIER'
OK 'ATD*99***1#'
CONNECT
/etc/ppp/chatscripts/tmobile-disconnect
"" "\K"
"" "+++ATH0"
Using a different carrier you will likely only need to replace wap.voicestream.com with the access point for your carrier.
To start pppd:
pppd call tmobile

# Or for more logging information:
# pppd nodetach call tmobile
This will create a ppp0 interface that can now be used as a standard network interface, and should set up a default route to the internet. For other carriers, typically you will only need a different access point listed in the AT+CGDCONT call, but further adjustments may be necessary.
| Note: | We have observed that the MTSMC-H5 connected to some networks has issues at or below 115200 baud. The issues observed are connection timeouts with the network itself. The connection between the modem and host device remain rock solid. While many applications are tolerant to the connection being reset, we have found some network downloads will abort without being able to recover. Running the unit at a faster baud rate, 230400 or higher, has been observed to eliminate this issue entirely. This does mean, however, that every time the device is started up, the modem must be issued an AT+IPR command (as noted below) at 115200 baud, then pppd started with the matched and higher baud rate in the peer script as shown above. |
Faster Data Rates
While the MTSMC-G2 (GPRS) is limited to 115200 baud, the MTSMC-H5 (HDSPA) can communicate over serial up to 921600 allowing actual transfer rates around 80-90KB/s.
To set a custom baudrate in Linux, the method depends on the CPU and kernel support. More recent UART peripherals have a higher clock and a smarter driver, and can therefore use custom baud rates inherently. However, some systems require the use of 'setserial' using the spd_cust flag and some manual settings. When the spd_cust baud rate is set, Linux will re-purpose 38400 baud to use the set custom baud rate.
First, test the unit to see if it is possible to open up the UART with a higher baud rate:
picocom -b 921600 /dev/ttymultidc
If the higher baud is unsupported, picocom will return a failure similar to the following:
FATAL: failed to add device /dev/ttymultidc: Invalid baud rate
If the above error is received, then the method below using setserial must be used.
Otherwise, the port can be closed, re-opened at 115200 baud to communicate with the modem, and then the following command can be used to tell the cell modem to enter a higher baud rate:
AT+IPR=921600
Now the port can be closed everything will function at the higher baud rate. Be sure to update the providers file. Using the example T-Mobile configuration, edit /etc/ppp/peers/tmobile and change 115200 to 38400. Starting pppd will now allow communication around 80-90KB/s (depending on your local cell tower's availability).
| Divisor | Rate |
|---|---|
| 1 | 921600 |
| 2 | 460800 |
| 3 | 307200 |
| 4 | 230400 |
| 5 | 184320 |
| 6 | 153600 |
| 7 | 131657 |
| 8 | 115200 |
Larger divisors will also work, but this should cover the common range. Using the setserial command you can specify the divisor. For example, to reach 115200 with the alternative baud base:
setserial /dev/ttymultidc spd_cust baud_base 921600 divisor 8
Next you will need to tell the modem to communicate at the faster baud rates. You can use a client like picocom or minicom to connect directly to the modem to send it commands.
picocom -b 38400 /dev/ttymultidc
Even though we are talking at 115200, 38400 must be specified since we are using a custom baud_base. You can test communication with the modem again by typing "AT", pressing enter, and receiving "OK". To reconfigure the modem to the faster 921600 baud rate you can send it this command:
AT+IPR=921600
This will respond with OK, but now you will need to quit out of picocom (ctrl a,x) and reconfigure the baud base to use divisor 1:
setserial /dev/ttymultidc spd_cust baud_base 921600 divisor 1
The only change now needed is in your providers file. Using the example T-Mobile configuration , edit /etc/ppp/peers/tmobile and change 115200 to 38400. Starting pppd will now allow communication around 80-90KB/s (depending on your local cell tower's availability).
Troubleshooting
If you are not able to obtain a ppp connection there are a few values you can check:
Troubleshooting: Cell Signal
Make sure ppp is not running, and execute these commands to check the signal strength.
stty raw -echo speed 115200 -F /dev/ttymultidc
cat /dev/ttymultidc &
echo -e "AT+CSQ\r\n" > /dev/ttymultidc
killall cat
The return value should be something like "+CSQ: 9,2", or with no connection, +CSQ: 99,99. The second argument is the signal strengh which follows this table:
| 0 | -113 dBm or less |
| 1 | -111 dBm |
| 2 to 30 | -109 to -53dBm |
| 31 | -51dBm or greater |
| 99 | not known or detectable |
If you return 99, make sure the antenna is connected and that you are in an area with good signal from your provider. Even without a valid SIM card you can have a good connection. If you are in another country, you may need to adjust the band for those supported by your carrier. The default value is appropriate for most US based carriers. Refer to the +WMBS command in your AT command guide for more options.
Troubleshooting: SIM card
If you have a good signal strength but are not obtaining a connection you can verify that the modem is able to read the subscriber number. This proves your SIM card is valid.
stty raw -echo speed 115200 -F /dev/ttymultidc
cat /dev/ttymultidc &
echo -e "AT+CNUM\r\n" > /dev/ttymultidc
killall cat
With a valid SIM this will return something like:
+CNUM: "","12345678901",129
If the SIM not detected you will only read ERROR. Make sure in this case that the card is inserted in the right direction so the pads on the card line up with the socket.
Troubleshooting: Other Options
If neither of the above steps get you connected you may want to contact your service provider for more information about where your connection attempts are failing.
NimbeLink Skywire modem
The CN5 XBee Socket is able to support NimbeLink Skywire Embedded modems. Information on setting up and configuring the power and USB interface for Skywire modules can be found here. Please note that there are various models of the Skywire modules that all support different interfaces. These include cdc_ether, cdc_ncm, USB serial, and a simple TTL UART. Both the USB ethernet and NCM interfaces present a network device to the system, while the USB serial and UART interfaces require PPP to manage the connection.
Please see the NimbeLink documentation for the specific module in use for more detailed information on establishing connection with a cellular network via the modem.
| Note: | Modems using the QBG95 hardware are not compatible with the TS-7553-V2 due to hardware incompatibility. This incompatibility is only on the TS-7553-V2 and QBG95. That is, other modems do not have this issue with the TS-7553-V2, and our other platforms are compatible with the QBG95 modem. |
Debian Application Development
Debian Jessie Cross Compiling
Debian Jessie previously provided cross compilers via the Emdebian project. However, Emdebian has been unmaintained for a number of years and is no longer able to provide a viable install package. In order to cross compile from a Debian Jessie workstation, a third party cross compiler is required.
A Debian Jessie install on a workstation has the ability to build for the same release on other architectures using Debian binary libraries. A PC, virtual machine, or chroot will need to be used for this. Install Debian Jessie for your workstation here.
From a Debian workstation (not the target), run the following commands to set up the cross compiler. Note that this expects a 64-bit Debian Jessie install on the workstation. 32-bit installations are not supported at this time.
# Run "lsb_release -a" and verify Debian 8.X is returned.  These instructions are not
# expected to work on any other version or distribution.

cd ~
wget http://ftp.embeddedTS.com/ftp/ts-arm-sbc/ts-7553-V2-linux/cross-toolchains/gcc-linaro-4.9-2016.02-x86_64_arm-linux-gnueabihf.tar.xz
# The above toolchain is from Linaro. Other cross compilers can be used but have not been tested.
mkdir cross_compiler
tar xvf gcc-linaro-4.9-2016.02-x86_64_arm-linux-gnueabihf.tar.xz -C ~/cross_compiler
export PATH=$PATH:~/cross_compiler/gcc-linaro-4.9-2016.02-x86_64_arm-linux-gnueabihf/bin/
# The 'export' command needs to be run every time the user logs in. It is possible to add this command to the user's ".bashrc" file
# in their home directory to ensure it is automatically run every time the user is logged in.
su root
dpkg --add-architecture armhf
apt-get update
apt-get install build-essential
This will install a toolchain that can be used with the prefix "arm-linux-gnueabihf-". The standard GCC tools will start with that name, eg "arm-linux-gnueabihf-gcc".
The toolchain can now compile a simple hello world application. Create hello-world.c on the Debian workstation:
#include <stdio.h>
int main(){
    printf("Hello World\n");
}
To compile this:
arm-linux-gnueabihf-gcc hello-world.c -o hello-world
file hello-world
This will return that the binary created is for ARM. Copy this to the target platform to run it there.
Debian Jessie supports multiarch which can install packages designed for other architectures. On workstations this is how 32-bit and 64-bit support is provided. This can also be used to install armhf packages on an x86 based workstation.
This cross compile environment can link to a shared library from the Debian root. The package would be installed in Debian on the workstation to provide headers and ".so" files. This is included in most "-dev" packages. When run on the arm target it will also need a copy of the library installed, but it does not need the -dev package. Note that since the cross compiler used is 3rd party and not directly from Debian, some compile commands that include libraries will need additional arguments to tell the compiler and linker where on the workstation to find the necessary headers and libraries. Usually, the additional arguments will look like the following string, however adjustments may need to be made depending on the application.
-I/usr/include -L/usr/lib/arm-linux-gnueabihf -L/lib/arm-linux-gnueabihf -Wl,-rpath=/usr/lib/arm-linux-gnueabihf,-rpath=/lib/arm-linux-gnueabihf
apt-get install libcurl4-openssl-dev:armhf

# Download the simple.c example from curl:
wget https://raw.githubusercontent.com/bagder/curl/master/docs/examples/simple.c
# After installing the supporting library, curl will link as compiling on the unit.
arm-linux-gnueabihf-gcc -I/usr/include -L/usr/lib/arm-linux-gnueabihf -L/lib/arm-linux-gnueabihf -Wl,-rpath=/usr/lib/arm-linux-gnueabihf,-rpath=/lib/arm-linux-gnueabihf simple.c -o simple -lcurl
Copy the binary to the target platform and run on the target. This can be accomplished with network protocols like NFS, SCP, FTP, etc.
If any created binaries do not rely on hardware support like GPIO or CAN, they can be run using qemu.
# using the hello world example from before:
./hello-world
# Returns Exec format error
apt-get install qemu-user-static
./hello-world
Installing New Software
Debian provides the apt-get system which allows management of pre-built applications. The apt tools require a network connection to the internet in order to automatically download and install new software. The update command will download a list of the current versions of pre-built packages.
Older Debian releases are moved to a different server to indicate it is no longer getting security updates. To download packages for these older distributions, edit /etc/apt/sources.list to only have the following lines:
Jessie:
deb http://archive.debian.org/debian/ jessie main
deb-src http://archive.debian.org/debian/ jessie main
Wheezy:
deb http://archive.debian.org/debian/ wheezy main
deb-src http://archive.debian.org/debian/ wheezy main
After modifying that file, be sure to update the package list:
apt-get update
A common example is installing Java runtime support for a system. Find the package name first with search, and then install it.
root@ts:~# apt-cache search openjdk
jvm-7-avian-jre - lightweight virtual machine using the OpenJDK class library
freemind - Java Program for creating and viewing Mindmaps
icedtea-7-plugin - web browser plugin based on OpenJDK and IcedTea to execute Java applets
default-jdk - Standard Java or Java compatible Development Kit
default-jdk-doc - Standard Java or Java compatible Development Kit (documentation)
default-jre - Standard Java or Java compatible Runtime
default-jre-headless - Standard Java or Java compatible Runtime (headless)
jtreg - Regression Test Harness for the OpenJDK platform
libreoffice - office productivity suite (metapackage)
icedtea-7-jre-jamvm - Alternative JVM for OpenJDK, using JamVM
openjdk-7-dbg - Java runtime based on OpenJDK (debugging symbols)
openjdk-7-demo - Java runtime based on OpenJDK (demos and examples)
openjdk-7-doc - OpenJDK Development Kit (JDK) documentation
openjdk-7-jdk - OpenJDK Development Kit (JDK)
openjdk-7-jre - OpenJDK Java runtime, using Hotspot Zero
openjdk-7-jre-headless - OpenJDK Java runtime, using Hotspot Zero (headless)
openjdk-7-jre-lib - OpenJDK Java runtime (architecture independent libraries)
openjdk-7-source - OpenJDK Development Kit (JDK) source files
uwsgi-app-integration-plugins - plugins for integration of uWSGI and application
uwsgi-plugin-jvm-openjdk-7 - Java plugin for uWSGI (OpenJDK 7)
uwsgi-plugin-jwsgi-openjdk-7 - JWSGI plugin for uWSGI (OpenJDK 7)
In this case you will want the openjdk-7-jre package. Names of packages are on Debian's wiki or the packages site.
With the package name apt-get install can be used to install the prebuilt packages.
apt-get install openjdk-7-jre
# More than one package can be installed at a time.
apt-get install openjdk-7-jre nano vim mplayer
For more information on using apt-get refer to Debian's documentation here.
Setting up SSH
To install ssh, install the package as normal with apt-get:
apt-get install openssh-server
Make sure the device is configured on the network and set a password for the remote user. SSH will not allow remote connections without a password or a valid SSH key pair.
passwd root
| Note: | The default OpenSSH server will not permit root to login via SSH as a security precaution. To allow root to log in via ssh anyway, edit the /etc/ssh/sshd_config file and add the line PermitRootLogin yes in the authentication section. This change will take effect after reboot or after sshd service restart.
|
After this setup it is now possible to connect from a remote PC supporting SSH. On Linux/OS X this is the "ssh" command, or from Windows using a client such as PuTTY.
| Note: | If a DNS server is not present on the target network, it is possible to save time at login by adding "UseDNS no" in /etc/ssh/sshd_config. |
Starting Automatically
A systemd service can be created to start up headless applications. Create a file in /etc/systemd/system/yourapp.service
[Unit]
Description=Run an application on startup

[Service]
Type=simple
ExecStart=/usr/local/bin/your_app_or_script

[Install]
WantedBy=multi-user.target
If networking is a dependency add "After=network.target" in the Unit section. Once you have this file in place add it to startup with:
# Start the app on startup, but will not start it now
systemctl enable yourapp.service

# Start the app now, but doesn't change auto startup
systemctl start yourapp.service
| Note: | See the systemd documentation for in depth documentation on services. |
To start an application on bootup with X11 instead change the x-session-manager. By default the system starts xfce:
root@ts:~# ls -lah /usr/bin/x-session-manager
lrwxrwxrwx 1 root root 35 May 26  2015 /usr/bin/x-session-manager -> /etc/alternatives/x-session-manager
root@ts:~# ls -lah /etc/alternatives/x-session-manager
lrwxrwxrwx 1 root root 19 May 26  2015 /etc/alternatives/x-session-manager -> /usr/bin/startxfce4
The x-session can be modified to only start specified processes. Create the file /usr/bin/mini-x-session with these contents:
#!/bin/bash
matchbox-window-manager -use_titlebar no &

exec xfce4-terminal
You may need to "apt-get install matchbox-window-manager." first. This is a tiny window manager which also has a few flags that simplify embedded use. Now enable this session manager and restart slim to restart x11 and show it now.
chmod a+x /usr/bin/mini-x-session
rm /etc/alternatives/x-session-manager
ln -s /usr/bin/mini-x-session /etc/alternatives/x-session-manager
service slim restart
If the x-session-manager process ever closes x11 will restart. The exec command allows a new process to take over the existing PID. In the above example xfce4-terminal takes over the PID of x-session-manager. If the terminal is closed with commands like exit the slim/x11 processes will restart.
Debian Stretch(9)
Getting Started
We've created an aftermarket image that runs Linux kernel 4.9 and offers a Debian Stretch userspace environment. The latest tarball of this can be downloaded below:
This can then be written to a microSD card or the on-board eMMC flash in order to be booted on the TS-7553-V2.
Debian Networking
By default, Debian Stretch does not configure any interfaces to be brought up or configured.
Debian can automatically set up the networking based on the contents of "/etc/network/interfaces.d/" files. For example, to enable DHCP for "eth0" by default on startup:
echo "auto eth0
iface eth0 inet dhcp" > /etc/network/interfaces.d/eth0
To set up a static IP:
echo "auto eth0
iface eth0 inet static
    address 192.168.0.50
    netmask 255.255.255.0
    gateway 192.168.0.1" > /etc/network/interfaces.d/eth0
echo "nameserver 1.1.1.1" > /etc/resolv.conf
To make this take effect immediately for either option:
service networking restart
To configure other interfaces, replace "eth0" with the other network device name. Some interfaces may use predictable interface names. For example, the traditional name for an ethernet port might be "eth1", but some devices may use "enp1s0" for PCIe, or "enx00D069C0FFEE" (the MAC address appended) for USB ethernet interfaces. Run 'ifconfig -a' or 'ip a' to get a complete list of interfaces, including the ones that are not configured.
Debian Wi-Fi Client
Wireless interfaces are also managed with configuration files in /etc/network/interfaces.d/. For example, to connect as a client to a WPA network with DHCP. Note some or all of this software may already be installed on the target.
Install wpa_supplicant:
apt-get update && apt-get install wpasupplicant -y
Run:
wpa_passphrase youressid yourpassword
This command will output information similar to:
network={
  	ssid="youressid"
  	#psk="yourpassword"
	psk=151790fab3bf3a1751a269618491b54984e192aa19319fc667397d45ec8dee5b
}
Use the hashed PSK in the specific network interfaces file for added security. Create the file /etc/network/interfaces.d/wlan0 with the contents:
allow-hotplug wlan0
iface wlan0 inet dhcp
    wpa-ssid youressid
    wpa-psk 151790fab3bf3a1751a269618491b54984e192aa19319fc667397d45ec8dee5b
To have this take effect immediately:
service networking restart
For more information on configuring Wi-Fi, see Debian's guide here.
Debian Wi-Fi Access Point
This section will discuss setting up the WiFi device as an access point that is bridged to an ethernet port. That is, clients can connect to the AP and will be connected to the ethernet network through this network bridge. The ethernet network must provide a DHCP server; this will be passed through the bridge to WiFi client devices as they connect.
It is also possible to run a DHCP client on the platform itself. In this case the hostapd.conf file needs to be set up without bridging and a DHCP server needs to be configured. Refer to Debian's documentation for more details on DHCP server configuration.
The 'hostapd' utility is used to manage the access point of the device. This is usually installed by default, but can be installed with:
apt-get update && apt-get install hostapd -y
| Note: | The install process may start an unconfigured 'hostapd' process. This process must be killed before moving forward. |
Modify the file "/etc/hostapd/hostapd.conf" to have the following lines:
ssid=YourWiFiName
wpa_passphrase=Somepassphrase
interface=wlan0
channel=7
driver=nl80211
logger_stdout=-1
logger_stdout_level=2
wpa=2
wpa_key_mgmt=WPA-PSK
| Note: | Refer to the kernel's hostapd documentation for more wireless configuration options. |
The access point can be started and tested by hand:
hostapd /etc/hostapd/hostapd.conf
Systemd auto-start with bridge to eth0
It is possible to configure the auto-start of 'hostapd' through systemd. The configuration outlined below will set up a bridge with "eth0", meaning the Wi-Fi connection is directly connected to the ethernet network. The ethernet network is required to have a DHCP server present and active on it to assign Wi-Fi clients an IP address. This setup will allow Wi-Fi clients access to the same network as the ethernet port, and the bridge interface will allow the platform itself to access the network.
Set up hostapd
First, modify the hostapd configuration to understand the bridge interface:
echo "bridge=br0" >> /etc/hostapd/hostapd.conf
Create the file "/etc/systemd/system/hostapd_user.service" with the following contents:
[Unit]
Description=Hostapd IEEE 802.11 AP
Wants=network.target
Before=network.target
Before=network.service
After=sys-subsystem-net-devices-wlan0.device
After=sys-subsystem-net-devices-br0.device
BindsTo=sys-subsystem-net-devices-wlan0.device
BindsTo=sys-subsystem-net-devices-br0.device

[Service]
Type=forking
PIDFile=/run/hostapd.pid
ExecStart=/usr/sbin/hostapd /etc/hostapd/hostapd.conf -P /run/hostapd.pid -B

[Install]
WantedBy=multi-user.target
Then enable this in systemd:
systemctl enable hostapd_user.service
systemctl enable systemd-networkd
Set up bridging
Create the following files with the listed contents.
"/etc/systemd/network/br0.netdev"
[NetDev]
Name=br0
Kind=bridge
"/etc/systemd/network/br0.network"
[Match]
Name=br0

[Network]
DHCP=yes
"/etc/systemd/network/bridge.network"
[Match]
Name=eth0

[Network]
Bridge=br0
Debian Wi-Fi Concurrent Client / Access Point
The Wi-Fi device on this platform supports concurrent operation of client and access point (STA and AP). Please see the "Wi-Fi Client" section above first to connect the Wi-Fi module, in STA mode, to an external AP. This demo showcases the Wi-Fi module starting its own AP mode via hostapd with a simple static IP address while also being concurrently connected to a separate AP.
The hostapd utility is used to manage the access point mode. This is usually installed by default, but can separately be installed with:
apt-get update && apt-get install hostapd -y
| Note: | The install process may start an unconfigured 'hostapd' process. This process must be killed before moving forward. |
Modify the file /etc/hostapd/hostapd.conf to have the following lines:
ssid=YourWiFiName
wpa_passphrase=Somepassphrase
interface=p2p0
auth_algs=3
channel=<channel>
driver=nl80211
logger_stdout=-1
logger_stdout_level=2
wpa=2
wpa_key_mgmt=WPA-PSK
| Note: | The channel used for AP must match the channel the STA is using! Be sure to set 'channel=...' in the above file to a proper channel number. |
| Note: | Refer to the kernel's hostapd documentation for more wireless configuration options. |
In order for the concurrent modes to work, a separate virtual wireless device must first be created. Note that hostapd.conf above lists interface=p2p0, a virtual interface with this name must be created:
iw wlan0 interface add p2p0 type managed
The access point can then be started and tested by hand:
hostapd /etc/hostapd/hostapd.conf &
An IP address can be set to p2p0:
ifconfig p2p0 192.168.0.1
From this point, other Wi-Fi clients can connect to the SSID YourWiFiName with the WPA2 key Somepassphrase with a static IP in the range of 192.168.0.0/24, and will be able to access the platform at 192.168.0.1. More advanced configurations are also possible, including bridging, routing/NAT, or simply separate networks with the Wi-Fi module connecting to a network and hosting its own private network with DHCP.
Cellular Data Network
DC-TS767-MT MultiTech Modem
The TS-7553-V2 includes support for the Multitech MTSMC-G2 or MTSMC-H5 connected via the TS-DC767-MT daughter card, which can connect to the internet using pppd. The modem is attached to the HD1 Header, also called the Daughter Card interface. The modem itself can be configured with the following commands:
ln -s /dev/ttymxc6 /dev/ttymultidc
There are two GPIO pins that can control reset and RTS of the cell modem. These two pins default to an I2C mode, so before they can be used, they must have the pinmux set to GPIO. This can be done with the following two commands:
peekpoke 32 0x20e0118 0x5  #Set RTS pin to GPIO, GPIO 69
peekpoke 32 0x20e011c 0x5  #Set reset pin to GPIO, GPIO 70
The DIO pins can be controlled now from the linux GPIO subsystem. In order to function properly, the RTS pin must be low, and the reset must be high. This can be done with the following commands:
echo "69" > /sys/class/gpio/export
echo "70" > /sys/class/gpio/export
echo "low" > /sys/class/gpio/gpio69/direction
echo "high" > /sys/class/gpio/gpio70/direction
The pppd application must be installed and any required modules loaded:
apt-get update && apt-get install -y ppp
This example is configured for T-Mobile in the US:
/etc/ppp/peers/tmobile
/dev/ttymultidc
noauth
115200
debug
usepeerdns
persist
defaultroute

connect "/usr/sbin/chat -v -f /etc/ppp/chatscripts/tmobile"
disconnect "/usr/sbin/chat -v -f /etc/ppp/chatscripts/tmobile-disconnect"
/etc/ppp/chatscripts/tmobile
TIMEOUT 10
ABORT 'BUSY'
ABORT 'NO ANSWER'
ABORT 'ERROR'

"" "\p\p\p\p\p\p\p\p\p\p\p\p+++\p\p\p\p\p\p\p\p\p\p\p\p"
"" "ATH0"

"OK" 'AT+CGDCONT=1,"IP","wap.voicestream.com"'

ABORT 'NO CARRIER'
OK 'ATD*99***1#'
CONNECT
/etc/ppp/chatscripts/tmobile-disconnect
"" "\K"
"" "+++ATH0"
Using a different carrier you will likely only need to replace wap.voicestream.com with the access point for your carrier.
To start pppd:
pppd call tmobile

# Or for more logging information:
# pppd nodetach call tmobile
This will create a ppp0 interface that can now be used as a standard network interface, and should set up a default route to the internet. For other carriers, typically you will only need a different access point listed in the AT+CGDCONT call, but further adjustments may be necessary.
| Note: | We have observed that the MTSMC-H5 connected to some networks has issues at or below 115200 baud. The issues observed are connection timeouts with the network itself. The connection between the modem and host device remain rock solid. While many applications are tolerant to the connection being reset, we have found some network downloads will abort without being able to recover. Running the unit at a faster baud rate, 230400 or higher, has been observed to eliminate this issue entirely. This does mean, however, that every time the device is started up, the modem must be issued an AT+IPR command (as noted below) at 115200 baud, then pppd started with the matched and higher baud rate in the peer script as shown above. |
Faster Data Rates
While the MTSMC-G2 (GPRS) is limited to 115200 baud, the MTSMC-H5 (HDSPA) can communicate over serial up to 921600 allowing actual transfer rates around 80-90KB/s.
To set a custom baudrate in Linux, the method depends on the CPU and kernel support. More recent UART peripherals have a higher clock and a smarter driver, and can therefore use custom baud rates inherently. However, some systems require the use of 'setserial' using the spd_cust flag and some manual settings. When the spd_cust baud rate is set, Linux will re-purpose 38400 baud to use the set custom baud rate.
First, test the unit to see if it is possible to open up the UART with a higher baud rate:
picocom -b 921600 /dev/ttymultidc
If the higher baud is unsupported, picocom will return a failure similar to the following:
FATAL: failed to add device /dev/ttymultidc: Invalid baud rate
If the above error is received, then the method below using setserial must be used.
Otherwise, the port can be closed, re-opened at 115200 baud to communicate with the modem, and then the following command can be used to tell the cell modem to enter a higher baud rate:
AT+IPR=921600
Now the port can be closed everything will function at the higher baud rate. Be sure to update the providers file. Using the example T-Mobile configuration, edit /etc/ppp/peers/tmobile and change 115200 to 38400. Starting pppd will now allow communication around 80-90KB/s (depending on your local cell tower's availability).
| Divisor | Rate |
|---|---|
| 1 | 921600 |
| 2 | 460800 |
| 3 | 307200 |
| 4 | 230400 |
| 5 | 184320 |
| 6 | 153600 |
| 7 | 131657 |
| 8 | 115200 |
Larger divisors will also work, but this should cover the common range. Using the setserial command you can specify the divisor. For example, to reach 115200 with the alternative baud base:
setserial /dev/ttymultidc spd_cust baud_base 921600 divisor 8
Next you will need to tell the modem to communicate at the faster baud rates. You can use a client like picocom or minicom to connect directly to the modem to send it commands.
picocom -b 38400 /dev/ttymultidc
Even though we are talking at 115200, 38400 must be specified since we are using a custom baud_base. You can test communication with the modem again by typing "AT", pressing enter, and receiving "OK". To reconfigure the modem to the faster 921600 baud rate you can send it this command:
AT+IPR=921600
This will respond with OK, but now you will need to quit out of picocom (ctrl a,x) and reconfigure the baud base to use divisor 1:
setserial /dev/ttymultidc spd_cust baud_base 921600 divisor 1
The only change now needed is in your providers file. Using the example T-Mobile configuration , edit /etc/ppp/peers/tmobile and change 115200 to 38400. Starting pppd will now allow communication around 80-90KB/s (depending on your local cell tower's availability).
Troubleshooting
If you are not able to obtain a ppp connection there are a few values you can check:
Troubleshooting: Cell Signal
Make sure ppp is not running, and execute these commands to check the signal strength.
stty raw -echo speed 115200 -F /dev/ttymultidc
cat /dev/ttymultidc &
echo -e "AT+CSQ\r\n" > /dev/ttymultidc
killall cat
The return value should be something like "+CSQ: 9,2", or with no connection, +CSQ: 99,99. The second argument is the signal strengh which follows this table:
| 0 | -113 dBm or less |
| 1 | -111 dBm |
| 2 to 30 | -109 to -53dBm |
| 31 | -51dBm or greater |
| 99 | not known or detectable |
If you return 99, make sure the antenna is connected and that you are in an area with good signal from your provider. Even without a valid SIM card you can have a good connection. If you are in another country, you may need to adjust the band for those supported by your carrier. The default value is appropriate for most US based carriers. Refer to the +WMBS command in your AT command guide for more options.
Troubleshooting: SIM card
If you have a good signal strength but are not obtaining a connection you can verify that the modem is able to read the subscriber number. This proves your SIM card is valid.
stty raw -echo speed 115200 -F /dev/ttymultidc
cat /dev/ttymultidc &
echo -e "AT+CNUM\r\n" > /dev/ttymultidc
killall cat
With a valid SIM this will return something like:
+CNUM: "","12345678901",129
If the SIM not detected you will only read ERROR. Make sure in this case that the card is inserted in the right direction so the pads on the card line up with the socket.
Troubleshooting: Other Options
If neither of the above steps get you connected you may want to contact your service provider for more information about where your connection attempts are failing.
NimbeLink Skywire modem
The CN5 XBee Socket is able to support NimbeLink Skywire Embedded modems. Information on setting up and configuring the power and USB interface for Skywire modules can be found here. Please note that there are various models of the Skywire modules that all support different interfaces. These include cdc_ether, cdc_ncm, USB serial, and a simple TTL UART. Both the USB ethernet and NCM interfaces present a network device to the system, while the USB serial and UART interfaces require PPP to manage the connection.
Please see the NimbeLink documentation for the specific module in use for more detailed information on establishing connection with a cellular network via the modem.
| Note: | Modems using the QBG95 hardware are not compatible with the TS-7553-V2 due to hardware incompatibility. This incompatibility is only on the TS-7553-V2 and QBG95. That is, other modems do not have this issue with the TS-7553-V2, and our other platforms are compatible with the QBG95 modem. |
Debian Application Development
Debian Stretch Cross Compiling
Debian Stretch provides cross compilers from the Debian apt repository archive for Debian Stretch. An install on a workstation can build for the same release on other architectures. A Linux desktop or laptop PC, virtual machine, or chroot will need to be used for this. Debian Stretch for a workstation can be downloaded from here.
From a Debian workstation (not the target), run these commands to set up the cross compiler:
# Run "lsb_release -a" and verify Debian 9.X is returned.  These instructions are not
# expected to work on any other version or distribution.
su root
# Not needed for the immediate apt-get install, but used
# so we can install package:armhf for cross compiling
dpkg --add-architecture armhf
apt-get update
apt-get install curl build-essential crossbuild-essential-armhf -y
This will install a toolchain that can be used with the prefix "arm-linux-gnueabihf-". The standard GCC tools will start with that name, eg "arm-linux-gnueabihf-gcc".
The toolchain can now compile a simple hello world application. Create hello-world.c on the Debian workstation:
#include <stdio.h>
int main(){
    printf("Hello World\n");
}
To compile this:
arm-linux-gnueabihf-gcc hello-world.c -o hello-world
file hello-world
This will return that the binary created is for ARM. Copy this to the target platform to run it there.
Debian Stretch supports multiarch which can install packages designed for other architectures. On workstations this is how 32-bit and 64-bit support is provided. This can also be used to install armhf packages on an x86 based workstation.
This cross compile environment can link to a shared library from the Debian root. The package would be installed in Debian on the workstation to provide headers and libraries. This is included in most "-dev" packages. When run on the arm target it will also need a copy of the library installed, but it does not need the -dev package.
apt-get install libcurl4-openssl-dev:armhf

# Download the simple.c example from curl:
wget https://raw.githubusercontent.com/bagder/curl/master/docs/examples/simple.c
# After installing the supporting library, curl will link as compiling on the unit.
arm-linux-gnueabihf-gcc simple.c -o simple -lcurl
Copy the binary to the target platform and run on the target. This can be accomplished with network protocols like NFS, SCP, FTP, etc.
If any created binaries do not rely on hardware support like GPIO or CAN, they can be run using 'qemu'.
# using the hello world example from before:
./hello-world
# Returns Exec format error
apt-get install qemu-user-static
./hello-world
Debian Installing New Software
Debian provides the apt-get system which allows management of pre-built applications. The apt tools require a network connection to the internet in order to automatically download and install new software. The update command will download a list of the current versions of pre-built packages.
apt-get update
A common example is installing Java runtime support for a system. Find the package name first with search, and then install it.
root@ts:~# apt-cache search openjdk
default-jdk - Standard Java or Java compatible Development Kit
default-jdk-doc - Standard Java or Java compatible Development Kit (documentation)
default-jdk-headless - Standard Java or Java compatible Development Kit (headless)
default-jre - Standard Java or Java compatible Runtime
default-jre-headless - Standard Java or Java compatible Runtime (headless)
jtreg - Regression Test Harness for the OpenJDK platform
libreoffice - office productivity suite (metapackage)
openjdk-8-dbg - Java runtime based on OpenJDK (debugging symbols)
openjdk-8-demo - Java runtime based on OpenJDK (demos and examples)
openjdk-8-doc - OpenJDK Development Kit (JDK) documentation
openjdk-8-jdk - OpenJDK Development Kit (JDK)
openjdk-8-jdk-headless - OpenJDK Development Kit (JDK) (headless)
openjdk-8-jre - OpenJDK Java runtime, using Hotspot JIT
openjdk-8-jre-headless - OpenJDK Java runtime, using Hotspot JIT (headless)
openjdk-8-jre-zero - Alternative JVM for OpenJDK, using Zero/Shark
openjdk-8-source - OpenJDK Development Kit (JDK) source files
uwsgi-app-integration-plugins - plugins for integration of uWSGI and application
uwsgi-plugin-jvm-openjdk-8 - Java plugin for uWSGI (OpenJDK 8)
uwsgi-plugin-jwsgi-openjdk-8 - JWSGI plugin for uWSGI (OpenJDK 8)
uwsgi-plugin-ring-openjdk-8 - Closure/Ring plugin for uWSGI (OpenJDK 8)
uwsgi-plugin-servlet-openjdk-8 - JWSGI plugin for uWSGI (OpenJDK 8)
java-package - Utility for creating Java Debian packages
In this case, the wanted package will likely be the "openjdk-8-jre" package. Names of packages can be found on Debian's wiki pages or the packages site.
With the package name apt-get install can be used to install the prebuilt packages.
apt-get install openjdk-8-jre
# More than one package can be installed at a time.
apt-get install openjdk-8-jre nano vim mplayer
For more information on using apt-get refer to Debian's documentation here.
Debian Setting up SSH
To install the SSH server, install the package with apt-get:
apt-get install openssh-server
Debian Stretch by default disallows logins directly from the user "root". Additionally, SSH will not allow remote connections without a password or valid SSH key pair. This means in order to SSH to the device, a user account must first be created, and a password set:
useradd --create-home --shell /bin/bash newuser
passwd newuser
After this setup it is now possible to connect to the device as user "newuser" from a remote PC supporting SSH. On Linux/OS X this is the "ssh" command, or from Windows using a client such as PuTTY.
Debian Starting Automatically
A systemd service can be created to start up headless applications. Create a file in /etc/systemd/system/yourapp.service
[Unit]
Description=Run an application on startup

[Service]
Type=simple
ExecStart=/usr/local/bin/your_app_or_script

[Install]
WantedBy=multi-user.target
If networking is a dependency add "After=network.target" in the Unit section. Once you have this file in place add it to startup with:
# Start the app on startup, but will not start it now
systemctl enable yourapp.service

# Start the app now, but doesn't change auto startup
systemctl start yourapp.service
| Note: | See the systemd documentation for in depth documentation on services. |
Buildroot
The full-featured Debian image may be too cumbersome for some applications. Applications that require faster bootup time or a smaller root filesystem will benefit greatly from using a lighter distribution like Buildroot. Using Buildroot for generating images makes it easy to keep software up to date, both userspace and kernel. Additionally, the use of Buildroot allows for building full images completely from source, with semi-reproducable builds, and full software license reports.
To assist customers heading down this path, we maintain our own Buildroot br2-external tree. This tree includes upstream Buildroot as a submodule, which eases updating between Buildroot releases. See the Buildroot manual for more information on Buildroot and br2-external trees.
In order to provide an easy transition from a larger Linux distribution to Buildroot, we provide and maintain two levels of configurations:
- The base configuration for each device brings in hardware support to get the unit booted, but offers minimal software support and relies mostly on tools provided by BusyBox.
- An "extra packages" defconfig that can be merged in with any of the base configurations in order to provide many additional packages to create an environment that is more consistent with larger Linux distributions.
The larger Buildroot configuration averages about 10 seconds of boot time, much of which is spent on networking. The base configurations can reduce this time significantly.
Our Buildroot br2-external currently uses the linux-5.10.y branch of our Linux LTS kernel repository for the majority of its supported platforms.
| Note: | Note that our base configurations include that device's utilities package where possible. Normally, these utilities (e.g. tshwctl, tsmicroctl, etc.) list the git hash of the build source in the help output. However, due to the Buildroot process, the git hash in these utilities reflects the git hash of Buildroot-ts, NOT of the utilities repository. There is no way to work around this without building the utilities outside of Buildroot.
|
Buildroot - Installing
When building Buildroot from source, the output files can be used to create a bootable microSD card and a bootable eMMC for the TS-7553-V2. The output files are also compatible with our USB Image Replicator.
We also offer a premade filesystem tarball that is based on our full Buildroot configuration. It can downloaded here: https://files.embeddedTS.com/ts-arm-sbc/ts-7553-V2-linux/distributions/ts7553-V2-Buildroot-latest.tar.xz
The default configuration was designed to be as close to our stock Debian distribution. This includes our ts7553v2-utils like tsmicroctl, our TS-SILO monitor daemon, drivers, firmware, and software for the Wi-Fi and Bluetooth module, and support for LCD + Keypad.
Buildroot - Building
Buildroot is intended to be completely cross-compiled from a host Linux workstation. This process creates a cross-compiler which is then used to build all target applications, kernel, etc., and then output a bootable image / tarball. The following instructions will create a bootable image / tarball for the target system:
Clone the repository:
git clone --recurse-submodules https://github.com/embeddedTS/buildroot-ts.git
cd buildroot-ts/
Configure the build:
# The following command uses a Buildroot script to merge two config files.
# The extra_packages_defconfig includes more usual packages to match our stock images
./buildroot/support/kconfig/merge_config.sh technologic/configs/extra_packages_defconfig technologic/configs/ts7553v2_defconfig

# A smaller base image can be made with bare hardware support using:
# make ts7553v2_defconfig
At this point, the default configuration can be modified if desired:
make menuconfig
And finally, start the build process:
make
The Buildroot process can take a large amount of time to build depending on available system resources. Note that if any changes occur in the config file, it is recommended to clean the build tree and start the process over. Buildroot ccache is not enabled by default, but can be to help speed up repeated builds. See the Buildroot manual for more information about ccache and Buildroot.
Once it is finished building, Buildroot will output a filesystem tarball to buildroot/output/images/rootfs.tar.xz. This file can be used with the Installing Buildroot instructions to get this tarball booted on the target device.
Buildroot - Cross Compiling
In order to generate a cross-compiler from Buildroot, first configure the target build as outlined in the first steps of the build instructions. Once configured, a separate make command can be issued to generate a tarball package of the cross-compiler. This can be unpacked to any location on the host Linux workstation's filesystem and then used to cross-compile additional applications for the target. The build, setup, and use of the cross-compiler can be done with the following steps:
# Be sure the target is configured first!
# The following command will output the cross-compiler package as well as build the target image completely if not built already
make sdk

# Unpack the tarball to new directory in the users home directory
# Note that the tarball name may be slightly different depending on how the toolchain is configured in Buildroot
mkdir ~/buildroot-toolchain
tar xf buildroot/output/images/arm-buildroot-linux-gnueabihf_sdk-buildroot.tar.gz -C ~/buildroot-toolchain/

# Update the path information for the toolchain (must be done when the tarball is unpacked, or if the root folder of the toolchain is moved!)
# Note that, as above, the path for the compiler may be slightly different depending on how the toolchain is configured in Buildroot
~/buildroot-toolchain/arm-buildroot-linux-gnueabihf_sdk-buildroot/relocate-sdk.sh

# Create a simple Hello World application source
cat << EOF > hello.c
#include <stdio.h>
void main(void) { printf("Hello!\n"); }
EOF

# Build a binary from the Hello World source that can be run on the target device
~/buildroot-toolchain/arm-buildroot-linux-gnueabihf_sdk-buildroot/bin/arm-linux-gcc hello.c -o hello

# This cross compiler can be added to the user's PATH variable for easy access
export PATH=$PATH:~/buildroot-toolchain/arm-buildroot-linux-gnueabihf_sdk-buildroot/bin
arm-linux-gcc hello.c -o hello
The hello binary can then be copied to the target device and executed on it.
Note that the make sdk command can be run at any time to generate the toolchain tarball. Even after Buildroot has generated the output image.
Buildroot is extremely flexible in its generation and use of a cross-compiler. See the Buildroot manual for more information on advanced use of the Buildroot generated toolchain as well as using Buildroot's generated cross-compiler as an external compiler for Buildroot.
Buildroot - Configuring Network
Buildroot implements the ip, ifconfig, route, etc., commands to manipulate the settings of interfaces. The first Ethernet interface is set up to come up automatically with our default configuration. The interfaces can also be manually set up:
# Bring up the CPU network interface
ifconfig eth0 up

# Set an IP address (assumes 255.255.255.0 subnet mask)
ifconfig eth0 192.168.0.50

# Set a specific subnet
ifconfig eth0 192.168.0.50 netmask 255.255.0.0

# Configure a default route. This is the server that provides an internet connection.
route add default gw 192.168.0.1

# Edit /etc/resolv.conf for the local DNS server
echo "nameserver 192.168.0.1" > /etc/resolv.conf
Most commonly, networks will offer DHCP which can be set up with one command:
# To setup the default CPU Ethernet port
udhcpc -i eth0
# All Ethernet ports can be made active and request DHCP addresses with:
udhcpc
To have network settings take effect on startup in Buildroot, edit /etc/network/interfaces:
# interface file auto-generated by Buildroot

auto lo
iface lo inet loopback

auto eth0
iface eth0 inet dhcp
  pre-up /etc/network/nfs_check
  wait-delay 15
Note that the default network startup may timeout on some networks, e.g. network protocols such as STP can delay packet movement. This can be resolved in Buildroot by adding network configuration options to fail after a number of attempts (rather than a timeout) or retry for a DHCP lease indefinitely. For example, adding one of the following lines under the iface eth0 inet dhcp section:
udhcpc_opts -t 0to infinitely retryudhcpc_opts -t 5to fail after five attempts.
See the man page for interfaces(5) for further information on the syntax of the interfaces file and all of the options that can be passed.
For more information on network configuration in general, Debian provides a great resource here that can be readily applied to Buildroot in most cases.
Buildroot - Installing New Software
Buildroot does not include a package manager by default (though it is possible to enable one). This means installing software directly on the platform can be cumbersome and is not the intended path when using Buildroot. It is recommended to modify the Buildroot configuration to include additional packages. See the Building Buildroot section for information on modifying the configuration to build additional packages.
If a desired package is not available in Buildroot, there are a number of options available moving forward. It is possible to add packages to the build process, though this does require some knowledge of Buildroot internals. Another option is to use the cross compiler that is output by Buildroot in order to compile packages on a host system and then copy them over to the target. It is also possible to install a toolchain directly on the device, and compile applications natively. The last option is the least recommended as it greatly increases the final image size and adds unnecessary complexity.
Buildroot - Setting Up SSH
The default configuration has Dropbear set up. Dropbear is a lightweight SSH server.
Make sure the device is configured on the network and set a password for the remote user. SSH will not allow remote connections without a password set. The default configuration does not set a password for the root user, nor are any other users configured.
passwd root
After this setup it is now possible to connect from a remote PC supporting SSH. On Linux/OS X this is the ssh command, or from Windows using a client such as PuTTY.
Buildroot - Starting Automatically
Buildroot defaults to using the BusyBox init system, and all of our provided configurations use this as well. The following custom startup script uses this format. For information on other init systems that Buildroot can use, as well as creating startup scripts for these, see the Buildroot manual.
The most straightforward way to add an application to startup is to create a startup script. This example startup script that will toggle the red LED on during startup, and off during shutdown. In this case the script is named customstartup which can be changed as needed.
Create the file /etc/init.d/S99customstartup with the following contents. Be sure to set the script as executable!
#! /bin/sh
# /etc/init.d/customstartup

case "$1" in
  start)
    echo 1 > /sys/class/leds/red-led/brightness
    ## If you are launching a daemon or other long running processes
    ## this should be started with
    # nohup /usr/local/bin/yourdaemon &
    ;;
  stop)
    # if you have anything that needs to run on shutdown
    echo 0 > /sys/class/leds/red-led/brightness
    ;;
  *)
    echo "Usage: customstartup start|stop" >&2
    exit 3
    ;;
esac

exit 0
| Note: | The $PATH variable is not set up by default in init scripts so this will either need to be done manually or the full path to your application must be included. |
Buildroot provides numerous mechanisms to create this file in the target filesystem at build time. See the Buildroot manual for more information on this.
This script will be automatically called at startup and shutdown thanks to the file location and naming. However, it can also be manually started or stopped:
/etc/init.d/S99customstartup start
/etc/init.d/S99customstartup stop
Backup / Restore
While all of our products ship with images pre-loaded in to any supplied media, there are many situations where new images may need to be written. For example, to restore a device to its factory settings or apply a customized image/filesystem for application deployment. Additionally, specific units may be used for development and that unit's disk images need to be replicated to other units to be deployed in the field.
We offer a number of different ways to accomplish both capturing images to be written to other units, and the actual writing process itself. See the sections below for details on our USB Image Replicator tool to capture and/or write images, as well as details on manual processes to capture and write images on each of this device's media.
Image Replicator
This platform supports our Image Replicator tool. The Image Replicator tool is intended for use by developers as a means to write bootable images or filesystems onto a device's media (SD / eMMC / SATA / etc.) as part of the developer's production or preparation process. In addition to writing media, the Image Replicator tool can capture images from a device's media and prepare them to be written to other devices.
The Image Replicator tool is a USB disk image that boots from a target device to capture or write USB drive-resident media directly onto the target without a host workstation. It runs from a USB drive and allows:
- Capturing an image of the device storage (eMMC/microSD)
- Writing an existing image back to media
- Creating bootable media for mass deployment
The USB disk image is based on Buildroot and contains a set of scripts that handle the capture and write processes. The processes and scripts are flexible, can be used as-is, or adapted into larger production processes to format and load data onto devices. A single USB drive can be used to capture images from a device and then, once inserted in to other devices, write those same images onto other devices. The capture process is not necessary if it is not needed. Images for the target device can be copied to the USB drive, booted on compatible units, and have the target images written to that unit's media.
Image Capture Process
The image capture process performs the following steps. For more detailed information, see the Image Capture section below.
- If no valid images exist on the disk, image capture starts.
- For each valid media present on the unit, a bit for bit copy of the source is made.
- This image is mounted, sanitized (to remove unneeded files and allow safe copying of the image to other units), and saved as either a disk image or a tarball, depending on the partition layout of the source disk.
- All images and tarballs are compressed, with both the output files' MD5 hash saved, as well as all of the files contained in the root partition (MD5 hashes saved) to a file for later verification.
The captured images and tarballs are named such that the USB Image Replicator disk can be immediately used to boot another unit and have it perform the Image Write process, writing that unit's media with the captured images.
| Note: | When using this process, the USB drive used for the Image Replicator must be sized large enough to handle multiple compressed images as well as the uncompressed copy of an active media image. If the image capture process runs out of space, the process indicates a failure. |
Image Write Process
The image write process performs the following steps. For more detailed information see the Image Write section below.
- For each valid media present on the unit, find the first valid source image file for it.
- If a source image exists for a media that is not present on the unit, then the process indicates a failure.
- If the source image is a tarball, format the target disk with an appropriate file system and unpack it to the target disk, verifying all files against the MD5 hash file list after they are written.
- If the source image is a disk image, write that to the target disk. If an MD5 file for the disk image exists, read back the written disk and compare it to the hash.
Creating a USB Image Replicator Disk
Image Replicator USB disk images can be found below:
Disk image: tsimx6ul-usb-image-replicator.dd.xz
Tarball: tsimx6ul-usb-image-replicator-rootfs.tar.xz
Two types of USB Image Replicator images are available for this platform: a tarball and an actual disk image. They both have the same contents yet provide different methods to write the Image Replicator tool to a USB disk.
- Disk Image (.dd.xz)
- The disk image is easier to write from different workstation OSes, will auto-expand to the full disk length on its first boot, and is intended to be used for image capture (and later image writing) due to its small size and auto-expansion process. We recommend this route for users who may not have access to a Linux workstation or need to capture images from a golden unit first.
- Tarball Image (.tar.xz)
- The tarball image is easiest to write from a Linux workstation, but requires creating a partition table on the USB disk (if one does not already exist), formatting the filesystem, and unpacking the tarball. It can readily be used for both image capture and writing, but is easiest when image capture is not needed, due to the auto-expansion process.
| Note: | This process recommends a solid-state USB drive. Slower USB drives, especially those with spinning media, may take too long to enumerate and the bootloader will not boot the Image Replicator disk. Low quality, damaged, and/or worn out USB drives may cause unexpected errors that appear unrelated to the USB drive itself. If there are issues using the Image Replicator, we recommend first trying a new, fresh, high-quality USB drive from a trusted brand. |
Disk Image
This process uses a small disk image that can be written to a USB device. This disk image uses an ext3 filesystem which expands on its first boot to the full length of the disk before beginning the image capture process, and is recommended for users who may not have access to a Linux workstation or who need to capture images from a golden unit.
It is possible to use the disk image only for image writing. However, to ensure that full disk space is available, it is recommended to write the disk image to a USB drive, set the IR_NO_CAPTURE_* Image Replicator Runtime Options, boot it on the target unit, let the system boot and expand to the disk, insert the USB drive back in to a workstation, and then copy in the desired image files for the target unit from the workstation.
Writing Disk Image From a Linux Workstation
The disk image can be written via the command line with the dd command (replace /dev/sdX with the correct USB device node):
xzcat <platform>-usb-image-replicator.dd.xz > /dev/sdX
Graphical tools also exist for this purpose, for example balenaEtcher[1] offers this functionality.
Writing Disk Image From a Windows Workstation
A number of tools exist for writing an image to a USB drive, including (but not limited to) balenaEtcher[1] and Win32DiskImager[2]
Writing Disk Image From a MacOS Workstation
We recommend using a tool such as balenaEtcher[1] to write disk images.
Tarball
This process is easiest on a Linux workstation, but can be performed on other operating systems so long as they can support a compatible filesystem, the xz compression algorithm, as well as the tarball archive format. Note that in many cases, one of our computing platforms running our stock Linux image can be used if a Linux workstation is not available. After writing the tarball to a USB disk, the full length of the USB disk would be available to copy source images, to write them to other units.
The image replicator and scripts require a minimum of 50 MB. Additionally, the size of target disk images or tarballs used also dictate the minimum USB disk size required. The USB drive should have only a single partition, which is formatted ext2[1] / 3 / 4[2] or FAT32/vfat[3] Note that other filesystems are not compatible with U-Boot and therefore cannot be used.
Writing Tarball From a Linux Workstation
# This assumes USB drive is /dev/sdc:
sudo mkfs.ext3 /dev/sdc1
sudo mkdir /mnt/usb/
sudo mount /dev/sdc1 /mnt/usb/
sudo tar --numeric-owner -xf /path/to/<platform>-usb-image-replicator-rootfs.tar.xz -C /mnt/usb/
sudo umount /mnt/usb/
Writing Tarball From a Windows Workstation
A third party tool is recommended, as native Windows archive tools have occasionally not worked correctly. Tools such as 7-Zip[4] or PeaZip[5] are known working. (It may also be possible to use Windows Subsystem for Linux following the Linux Workstation instructions above, but this has not been tested.)
Note that some Windows tools may attempt to use the whole disk, rather than create a partition table. A partition table with a single partition is required for U-Boot support.
With a formatted USB disk, the archive can be unpacked to the root folder of the USB disk. Be sure to not unpack the tarball contents into a new folder on the drive, as this will not boot.
- ↑ The ext2 filesystem has a max file size limit as low at 16 GiB. This may cause issues for Image Capture.
- ↑ . Use of ext4 may require additional options. U-Boot on some platforms does not support the 64-bit addressing (added as default) in recent revisions of
mkfs.ext4. If using e2fsprogs 1.43 or newer, the options-O ^64bit,^metadata_csummay need to be used with ext4 for proper compatibility. Older versions of e2fsprogs do not need these options passed, nor are they needed for ext2 / 3. - ↑ . The FAT32 (supported by vfat in Linux) filesystem has a max file size limit of 4 GiB. This may cause issues for Image Capture.
- ↑ embeddedTS is not affiliated with this tool. 7-Zip 21.07 tested in Windows 10 on 20220222
- ↑ embeddedTS is not affiliated with this tool. PeaZip 7.2.0 tested in Windows 10 on 20220222
Running the Image Replicator Tool
Once a USB drive is formatted with the Image Replicator tool (see Creating a USB Image Replicator Disk for the correct files and process), boot to this USB drive (note that the Image Replicator already sets up the correct U-Boot boot scripts to boot to the USB drive, see the aforementioned section for details on how to make U-Boot call the scripts on the USB drive). This will start either image capture if no disk images/tarballs are present on the USB drive, or image write if there are disk images/tarballs present on the USB drive.
Image Replicator Runtime Options
Some of the runtime operations of the Image Replicator can be specified. These are handled by creating empty files in the root folder of the bootable USB drive. When booted, these files are analyzed and actions taken based on them.
| Option | Description |
|---|---|
|
|
When capturing, skip media-matching this name. See the respective platform manual for information on which names correspond to which physical media. Note that the names are generic and match what the media is captured as, regardless of actual device node. The names are uniform between capture and write for a given system. |
IR_NO_COMPRESS
|
When capturing, do not compress the data. On slower systems, slower disks, or systems with a large amount of data to capture, the final compression can take a significant amount of time. This option will allow a capture, but will not attempt to compress it. |
IR_SHELL_ONLY
|
When booting, skip doing any of the image replication process (Capture or Write) and instead drop to a login prompt. Useful for debugging. Note that, to prevent any confusion the system will indicate a non-critical failure when skipping any of the Image Replication process. |
Image Replicator LED Status
The green and red LEDs of the platform are used to indicate status.
Any LED patterns not matching the table below indicate different operational states of the platform itself, e.g. executing the bootloader, the kernel is running but Image Replicator has not yet started, etc.
| Green | Red | State | Description |
|---|---|---|---|
| Short Strobe | Solid | Running | The Image Replicator process is running. |
| 0.5 Hz Blink | Off | Succeeded | All operations being performed by the Image Replicator have completed successfully. |
| Off | 0.5 Hz Blink | Non-critical Failure | One or more operations being performed by the Image Replicator have failed to complete. View logs in /tmp/logs/ as well as the failure reason in /tmp/failed
|
| Off | 4 Hz Blink | Critical Failure | An operation has failed in a way that could leave the device inoperable if power were to be removed. View logs in /tmp/logs as well as the failure reason in /tmp/failed.
|
Image Capture
If no valid images to write exist on the booted USB Image Replicator drive, the image capture process starts automatically.
Note that while in progress, the USB Image Replicator drive is mounted read-write. Do not remove power or disconnect the USB Image Replicator drive until the whole process has completed.
To help diagnose failures, files in /tmp/logs/ contain output from each capture process.
For each media present on the unit (SD / eMMC / SATA / etc.), the image capture process will do the following:
- Copy the entire media image to an appropriately named file on the USB Image Replicator drive, e.g.
sdimage.dd. No data is written to the source media and it is never mounted. The source disk can follow the stock partition layout, or implement a customized one. - Perform an fsck on the Linux rootfs partition in the image file. Note that, if deviating from the standard partition layout, it may be necessary to modify the scripts handling the capture process.
- Mount the Linux rootfs partition from the image file and sanitize the filesystem. The sanitization process removes temporary files (e.g.
/log/files), unique files (e.g. ssh private key files, machine ID files), adds a file to indicate that it is a custom image with the date as its contents, etc. The full list of operations can be found in this script. It may be necessary to modify this file for unique situations. - If the media's partition layout uses only a single partition, the filesystem is packed in to a tarball on the USB Image Replicator drive which is appropriately named and compressed, e.g.
sdimage.tar.xz. The image file is then unmounted and removed from the USB Image Replicator drive. - If the media's partition layout uses multiple partitions, the image file is then unmounted, an md5sum of the image file taken, compressed and appropriately named on the USB Image Replicator drive, e.g.
emmcimage.dd.xz, and then an md5sum of the compressed image is taken.
Note that when using this process, the USB Image Replicator drive that is used must be sized large enough to handle multiple compressed images as well as the uncompressed copy of the media image actively being worked with. If the image capture process runs out of space, the process will indicate a failure via the LEDs.
The images files captured are saved to the root folder of the USB Image Replicator drive. Upon completion, it is safe to remove power or unplug the USB drive.
For more details on the image capture process, see this script.
Image Write
This process is used to write existing images to media on a target unit. If appropriately named disk images or tarballs (see table below) are present in the root folder of the USB Image Replicator drive when booted, then the startup scripts will start the image writing process. The latest disk images we provide for our platforms can be downloaded from our FTP site, see the backup and restore section for links to these files.
Note that the USB Image Replicator drive remains read-only through the entire process but target devices may be mounted or actively written. It is not advised to remove power or disconnect the USB Image Replicator drive until the whole process has completed.
To help diagnose failures, files in /tmp/logs/ contain output from each writing process.
The Image Replicator script expects disk images or tarballs to have specific names to match the target media. The script will attempt to match tarball and then disk image names (in the order they are listed in the table below) for each target media, using the first file that is found to write to the target media. Note that symlinks can be used on the USB Image Replicator disk if formatted with a filesystem that supports symlinks. This can be used, for example, to write the same tarball to both SD and eMMC from only a single copy of the source tarball.
Upon completion, it is safe to remove power or unplug the USB drive.
For more details on the image write process, see this script.
The following table is the list of valid file names and how they are processed:
| Target media | Accepted filenames | Description |
|---|
| SD Card |
|
Tar of the filesystem. This will repartition the SD card to a single partition and extract this tarball to the filesystem. If present, a file named /md5sums.txt in the tarball will have its contents checked against the whole filesystem after the tarball is extracted. This md5sums.txt file is optional and can be omitted, but it must not be blank if present. This file is present in our official images and is created during image capture with the Image Replicator tool.
|
|---|---|---|
|
|
Disk image of the media. This will be written to the SD card block device directly. If present on the USB Image Replicator drive, a file named /sdimage.dd.md5 will be used to verify the data written to the SD card against this checksum. This file is provided with our official images and is created during image capture with the Image Replicator tool.
|
| eMMC |
|
Tar of the filesystem. This will repartition the eMMC to a single partition and extract this tarball to the filesystem. If present, a file named /md5sums.txt in the tarball will have its contents checked against the whole filesystem after the tarball is extracted. This md5sums.txt file is optional and can be omitted, but it must not be blank if present. This file is present in our official images and is created during image capture with the Image Replicator tool.
|
|---|---|---|
|
|
Disk image of the media. This will be written to the eMMC block device directly. If present on the USB Image Replicator drive, a file named /emmcimage.dd.md5 will be used to verify the data written to the SD card against this checksum. This file is provided with our official images and is created during image capture with the Image Replicator tool.
|
| U-Boot |
|
U-Boot binary blob. This will be written to the bootloader area of eMMC. If the file /u-boot.imx.md5 is present on the USB drive, this will be used to verify the data written to disk.
|
|---|
Building the Image Replicator from Source
The Image Replicator tool uses Buildroot to create the bootable USB disk image and tarball. See the project repository on github for information on compatibility and instructions on building: https://github.com/embeddedTS/buildroot-ts
Creating A Production Image
| Note: | Our Image Replicator tool can be used to automate this process. |
It is usually desired to create a golden image to use for unit production after development is complete. This process can vary greatly from application to application but there are a few steps that are going to be most often wanted. These include cleaning up temporary files, removing files that should be unique and re-generated on the first boot (SSH keys, machine-id files, etc.), setting up the hostname, and so on. We have created a script that will automate most of this process and provides hooks for additional scripts to be called as well. The script is simply passed the device node of the development disk or an existing .dd file. From this, it will create a new .dd file based on the partition scheme with all modifications made to the new image. The image source is left completely untouched and is read only. The script also assumes that the last partition on the disk is the bootable linux partition. If this is not the case or there are multiple partitions that are used in the end application, the script will need to be modified in order to accommodate this fact.
| Note: | The script uses output from various commands. The output format of linux utilities can vary greatly from distribution to distribution, or even within versions of the distribution. It is strongly recommended to verify the final processed image contains everything necessary for the application and that all processes completed without issue. |
The simplest use of the script is:
./prep_customer_image /dev/sdX <output base name>Note that /dev/sdXv will need to be changed accordingly. Be sure to pass the whole disk and not just a partition.
The <output base name> is used as the base for all files output. For example, if "TechnologicSystems-latest" was used, then the compressed tarball output would be named "TechnologicSystems-latest.tar.bz2" (or it may end with ".tar.xz" depending on the compression used by the script). If no base name is provided, then the current date is used.
Additionally, there are two hooks available in the 'prep_customer_image' script, "prep" and "post". The top of the file has two variables, PREP_SCRIPTS="" and POST_SCRIPTS="". Adding in a space separated list of script names to those variables will cause them to be called in order. For example, setting PREP_SCRIPTS="add_application change_hostname" will cause the 'prep_customer_image' script to run through its initial steps, then call ./add_application, then call ./change_hostname, and then will continue with the rest of the script steps.
Every script for "prep" and "post" is called with a single argument, the name of the image file. This specifically will be <output base name>.dd. At the time of calling the prep scripts, the folder ./mount_point/ will have the last partition of the image file mounted as read/write. It is not wise to modify the image file directly since it is already mounted. All of the post scripts are called after the last partition of the image file is unmounted. This can be useful for creating additional file outputs, extracting specific partition images, etc., from the image itself. We have used these hooks in the past to remove special files and create additional images for our DoubleStore based devices.
It is also possible to run this script directly on the device when booted. This can be used to take an image of eMMC for example, when booted from the SD card. We always recommend doing initial development on SD, creating an image from that on a host PC, and then transferring it to the eMMC. This process makes development and image creation faster. If using the 'prep_customer_image' script from a booted device, be sure there is enough free space as the script creates a disk image of the target disk and then copies that in to a tarball, compressing everything as the final step.
The "prep_customer_image" script can be found in the TS-7553-V2 utilities github.
microSD Card
| Note: | Our Image Replicator tool can be used to automate this process. |

|
Click to download the latest tarball. |
Most SD cards ship with a single partition, which is ideal. However the instructions below will destroy the partition table and use 'parted' to recreate it and make a single partition. Note that any other preferred tool can be used instead, however the partition table must be "MBR" format for U-Boot to properly parse it.
Using other OSs
At this time, we're unable to provide assistance with writing SD cards for our products from non-Linux based operating systems. We acknowledge however, that there are methods to write images and files from a variety of difference operating systems. If a native installation of Linux is unavailable, we recommend using a Virtual Machine. See the Getting Started section for links to common virtualization software and Linux installation.
Using a Linux workstation
An SD card can be written to allow it to be bootable. Download the above file and write this from a Linux workstation using the information below. A USB SD adapter can be used to access the card; or if the workstation supports direct connection of SD cards, that can be used instead. Once inserted in to the workstation, it is necessary to discover which /dev/ device corresponds with the inserted SD card before the image can be written.
Option 1: using 'lsblk'
Newer distributions include a utility called 'lsblk' which allows simple identification of the intended card.
| Note: | This command may need to be run as the root user: |
$ lsblk

NAME   MAJ:MIN RM   SIZE RO TYPE MOUNTPOINT
sdY      8:0    0   400G  0 disk
├─sdY1   8:1    0   398G  0 part /
├─sdY2   8:2    0     1K  0 part
└─sdY5   8:5    0     2G  0 part [SWAP]
sr0     11:0    1  1024M  0 rom
sdX      8:32   1   3.9G  0 disk
├─sdX1   8:33   1   7.9M  0 part
├─sdX2   8:34   1     2M  0 part
├─sdX3   8:35   1     2M  0 part
└─sdX4   8:36   1   3.8G  0 part
In this case the, SD card is 4GB, so sdX is the target device and already contains 4 partitions. Note that sdX is not a real device, it could be sda, sdb, mmcblk0, etc. embeddedTS is not responsible for any damages cause by using the improper device node for imaging an SD card. The instructions below to write to the device will destroy the partition table and any existing data!
Option 2: Using 'dmesg'
After plugging in the device, the dmesg command can be used to list recent kernel events. When inserting a USB adapter, the last few lines of dmesg output will be similar to the following (note that this command may need to be run as the root user):
$ dmesg
...
scsi 54:0:0:0: Direct-Access     Generic  Storage Device   0.00 PQ: 0 ANSI: 2
sd 54:0:0:0: Attached scsi generic sg2 type 0
sd 54:0:0:0: [sdX] 3862528 512-byte logical blocks: (3.97 GB/3.84 GiB)
...
In this case, sdX is shown as a 3.97GB card with a single partition. Note that sdX is not a real device, it could be sda, sdb, mmcblk0, etc. embeddedTS is not responsible for any damages cause by using the improper device node for imaging an SD card. The instructions below to write to the device will destroy the partition table and any existing data!
The instructions below use the latest stock image, but it is also possible to use this process to update the TS-7553-V2 to the Linux 4.9 kernel with Debian Stretch image.
The following commands will reformat the first partition of the SD card, and unpack the latest filesystem on there. Replace the /dev/sdX on the first line with the correct whole disk device node!
# Update this variable to match the specific device node as it appears on your PC!
export SD_DEV="/dev/sdX"

# Verify nothing else has this mounted
sudo umount "${SD_DEV}"1

# Remove, and re-set the partition table, ensuring there is a single partition. Additional partitions can be added, however U-Boot expects the 1st partition to have the root filesystem tarball.
sudo dd if=/dev/zero bs=512 count=1 of="${SD_DEV}"
sudo parted -s -a optimal "${SD_DEV}" mklabel msdos
sudo parted -s -a optimal "${SD_DEV}" mkpart primary ext3 0% 100%
sudo mkfs.ext3 -F "${SD_DEV}"1

# Mount, unpack filesystem tarball, and flush all cached data
sudo mkfs.ext3 "${SD_DEV}"1
sudo mkdir /mnt/sd
sudo mount "${SD_DEV}"1 /mnt/sd/
wget https://files.embeddedTS.com/ts-arm-sbc/ts-7553-V2-linux/distributions/ts7553-V2-latest.tar.xz
sudo tar -xf ts7553-V2-latest.tar.xz -C /mnt/sd
sudo umount /mnt/sd
sync| Note: | The ext4 filesystem can be used instead of ext3, but it may require additional options. U-Boot does not support the 64-bit addressing added as the default behavior in recent revisions of mkfs.ext4. If using e2fsprogs 1.43 or newer, the options -O ^64bit,^metadata_csum must be used with ext4 for proper compatibility. Older versions of e2fsprogs do not need these options passed for ext4 support nor are they needed for ext3.
|
Once written, the files on disk can be verified to ensure they are the same as the source files in the archive. Reinsert the disk to flush the block cache completely, then run the following commands (Note that this expects to have the bash variable still set up from above):
sudo mount "${SD_DEV}"1 /mnt/sd
cd /mnt/sd/
sudo md5sum --quiet -c md5sums.txt
cd -
sudo umount /mnt/sd
sync
The md5sum command will report what differences there are, if any, and return if it passed or failed.
eMMC
U-Boot UMS (USB mass storage)
| Note: | Our Image Replicator tool can be used to automate this process. |
U-Boot on the TS-7553-V2 supports the "ums" command to allow the eMMC device (or SD card, or USB device) to be accessible directly on a host PC via USB mass storage. This method is generally slower than direct access from Linux when booted from SD on TS-7553-V2 itself, but it allows for direct updating of the flash media from a host device.
| Note: | When using this method, do not write the last sector of the disk. This will cause the U-Boot UMS command to return as it thinks the whole disk has now been written and the disk imaging process has completed. The instructions below take this in to account by setting up the partition table to never include the last sector of the disk and the tools used have been selected to ensure that the last sector is not written at any time during the partition table setup. |
| Note: | It is recommended to use a host PC with a native linux install. It has been observed that some VMs fail to correctly pass-through the USB device created on the TS-7553-V2 in U-Boot for UMS. |
On the TS-7553-V2, set the U-Boot jumper before applying power. Insert the USB device cable to a host PC and open the serial console. At the U-Boot prompt, run the following command:
run emmc-umsThe USB serial will immediately disconnect, and the USB mass storage device provided by the TS-7553-V2 will begin to enumerate. The following commands can then be used to set up the eMMC and unpack the filesystem tarball on to it. The instructions below use the latest software image.
Note that the instructions use a bash variable to define the device node; this allows the commands to be copy/pasted as-is to a terminal or in a script. Ensure that the correct device node is passed! The node "/dev/sdX" is used in the example below, update that line to use the correct whole-device node.
# Update this variable to match the specific device node as it appears on your PC!
export UMS_DEV="/dev/sdX"

# Verify nothing else has the partition mounted
sudo umount "${UMS_DEV}"1

# Remove, and re-set the partition table, ensuring there is a single partition that ends just before the last sector of disk
sudo dd if=/dev/zero bs=512 count=1 of="${UMS_DEV}"
sudo echo 'label: dos' | sfdisk "${UMS_DEV}"
sudo parted -s -a optimal "${UMS_DEV}" mkpart primary ext3 0% 99%
sudo mkfs.ext3 -F "${UMS_DEV}"1

# Mount, unpack filesystem tarball, and flush all cached data
sudo mkdir /mnt/emmc
sudo mount "${UMS_DEV}"1 /mnt/emmc
wget https://files.embeddedTS.com/ts-arm-sbc/ts-7553-V2-linux/distributions/ts7553-V2-latest.tar.xz
sudo tar -xf ts7553-V2-latest.tar.xz -C /mnt/emmc
sudo umount /mnt/emmc
sync| Note: | The ext4 filesystem can be used instead of ext3, but it may require additional options. U-Boot does not support the 64-bit addressing added as the default behavior in recent revisions of mkfs.ext4. If using e2fsprogs 1.43 or newer, the options -O ^64bit,^metadata_csum must be used with ext4 for proper compatibility. Older versions of e2fsprogs do not need these options passed for ext4 support nor are they needed for ext3.
|
Once written, the files on disk can be verified to ensure they are the same as the source files in the archive. To do so, run the following commands (Note that this expects to have the bash variable still set up from above):
sudo mount "${UMS_DEV}"1 /mnt/emmc
cd /mnt/emmc/
sudo md5sum --quiet -c md5sums.txt
cd -
sudo umount /mnt/emmc
sync
The md5sum command will report what differences there are, if any, and return if it passed or failed.
At this point, the device is unmounted and is sync'ed. The TS-7553-V2 can safely be powered off. Be sure to disconnect the USB cable as well to ensure the system is fully powered off.
Booted from SD
| Note: | Our Image Replicator tool can be used to automate this process. |
These commands assume the TS-7553-V2 is booted from the SD card, the user is logged in as root, and eMMC already contains a single partition:
# Verify nothing else has the partition mounted
umount /dev/mmcblk1p1

mkfs.ext3 /dev/mmcblk1p1
mount /dev/mmcblk1p1 /mnt/emmc
wget https://files.embeddedTS.com/ts-arm-sbc/ts-7553-V2-linux/distributions/ts7553-V2-latest.tar.xz
tar -xf ts7553-V2-latest.tar.xz -C /mnt/emmc
umount /mnt/emmc
sync| Note: | The ext4 filesystem can be used instead of ext3, but it may require additional options. U-Boot does not support the 64-bit addressing added as the default behavior in recent revisions of mkfs.ext4. If using e2fsprogs 1.43 or newer, the options -O ^64bit,^metadata_csum must be used with ext4 for proper compatibility. Older versions of e2fsprogs do not need these options passed for ext4 support nor are they needed for ext3.
|
Once written, the files on disk can be verified to ensure they are the same as the source files in the archive. To do so, run the following commands:
mount /dev/mmcblk1p1 /mnt/emmc
cd /mnt/emmc/
md5sum --quiet -c md5sums.txt
cd -
umount /mnt/emmc
sync
The md5sum command will report what differences there are, if any, and return if it passed or failed.
Compile the Kernel
Linux 4.1.15 (stock)
The stock image includes a 4.1.15 kernel meant to be used with Debian Jessie. The latest software image is a tarball that contains the kernel binaries and Debian Jessie filesystem. For adding new support to the kernel, or recompiling with more specific options you will need to have a compatible Linux workstation available that can handle the cross compiling. Compiling the kernel on the device is not supported or recommended.
Prerequisites
A cross compiler is necessary, for recent Debian distributions, please follow the Debian Jessie cross compiling instructions to install a compatible cross compiler.
For other distributions, please refer to their documentation to find equivalent tools.
Additionally, some libraries and tools are required for the kernel build process:
# Install dependencies for kernel build
# The following command is for Ubuntu / Debian workstations. If using a different
# distribution, please consult distribution docs for the proper commands to install
# new packages/tools/libraries/etc.
apt-get install libncurses5-dev bc lzop
Download sources and configure
git clone https://github.com/embeddedTS/linux-tsimx
cd linux-tsimx
git checkout ts-imx_4.1.15_2.0.0_ga

# These next commands set up some necessary environment variables
export ARCH=arm
export CROSS_COMPILE=arm-linux-gnueabihf-
export LOADADDR=0x80800000

# This sets up the default configuration that we ship with
make tsimx6ul_defconfig
Once you have the configuration ready you can make your changes to the kernel. Commonly a reason for recompiling is to add support that was not built into the standard image's kernel. You can get a menu to browse available options by running:
make menuconfigYou can use the "/" key to search for specific terms through the kernel.
Build the kernel
Once you have it configured you can begin building the kernel. This usually takes about 5-10 minutes. This group of commands will also output a uImage file used by U-Boot on the TS-7680.
make && make zImage && make modulesWe recommend running 'make' with the -jX argument, where X is the number of CPU cores+1 present on the build machine. This will greatly increase build speed.
Install the kernel/initramfs, headers, and modules
Next you need to install the kernel and modules to the SD card. Use the following to update the kernel, headers, and modules, this assumes the SD card connected to the workstation is assigned the device node /dev/sdc, please adjust the first command based on your specific setup:
export DEV=/dev/sdc1
sudo mkdir /mnt/sd
sudo mount "$DEV" /mnt/sd
sudo cp arch/arm/boot/zImage  /mnt/sd/boot/
sudo cp arch/arm/boot/dts/imx6*ts*.dtb /mnt/sd/boot/
INSTALL_MOD_PATH="/mnt/sd" sudo -E make modules_install
sudo -E make headers_install INSTALL_HDR_PATH="/mnt/sd/usr"
sudo umount /mnt/sd/
sync
Linux 4.9.y
We provide an aftermarket image that includes a 4.9.y kernel that is intended to be used with Debian Stretch.
Compiling the kernel requires an armhf toolchain. We recommend development using Debian Stretch workstation which includes an armhf compiler in the repositories. See the Debian Stretch cross compile section for instructions on installing the proper cross compiler.
Additionally, some libraries and tools are required for the kernel build process:
# Install dependencies for kernel build
# The following command is for Ubuntu / Debian workstations. If using a different
# distribution, please consult distribution docs for the proper commands to install
# new packages/tools/libraries/etc.
apt-get install libncurses5-dev bc lzop
git clone https://github.com/embeddedTS/linux-lts
# To do a shallow clone of just the latest snapshot of the linux-4.9.y branch, which results in a smaller download size and size on disk, the following command can be used:
# git clone --depth 1 https://github.com/embeddedTS/linux-lts -b linux-4.9.y
cd linux-4.9.y

# These next commands set up some necessary environment variables
export ARCH=arm
export CROSS_COMPILE=arm-linux-gnueabihf-
export LOADADDR=0x80800000

# This sets up the default configuration that we ship with
make tsimx6ul_defconfig

## Make any changes in "make menuconfig" or driver modifications, then compile
make && make zImage
To install the kernel and modules to an SD card, attach it to the PC and assuming the the SD card shows up as /dev/sdc, run the following:
export DEV=/dev/sdc1
sudo mount "$DEV" /mnt/sd
sudo rm /mnt/sd/boot/zImage
sudo cp arch/arm/boot/zImage  /mnt/sd/boot/zImage
sudo cp arch/arm/boot/dts/imx6ul*ts*.dtb /mnt/sd/boot/
INSTALL_MOD_PATH="/mnt/sd" sudo -E make modules_install
sudo -E make headers_install INSTALL_HDR_PATH="/mnt/sd/usr"
sudo umount /mnt/sd/
sync
Linux 5.10.y
| Note: | At this time we do not have an updated userspace more recent than our Debian Stretch distribution. The Debian Stretch disk image can be used as a base and is compatible with the 5.10 kernel. If a newer userspace is needed, we recommend our Buildroot repository for building a complete system image which includes the 5.10 kernel. |
A compatible armhf cross compiler is needed for building the 5.10 kernel. We recommend using the cross compiler available in Debian distributions (the linked instructions are for Debian Stretch but will work on more recent Debian distributions as well). It is also possible to use our Buildroot repository to build a compatible cross compiler.
Download and Configure
These steps assume a host Linux workstation with an appropriate cross compiler. While on most platforms the kernel can be downloaded, built, and installed all on the device, we recommend against this due to the amount of time, memory, and disk space that can be needed for a build.
Prerequisites
In addition to a cross compiler, a number of host tools are required.
# Install dependencies for kernel build
# The following command is for Ubuntu / Debian workstations. If using a different
# distribution, please consult distribution docs for the proper commands to install
# new packages/tools/libraries/etc.
apt-get install git fakeroot build-essential ncurses-dev xz-utils libssl-dev bc flex libelf-dev bison| Note: | The above prerequisite libraries and tools may not be the complete list, depending on the workstation's distribution and age. It may be necessary to install additional packages to support kernel compilation. |
Download kernel repo on a host Linux workstation:
git clone -b linux-5.10.y https://github.com/embeddedTS/linux-lts

# Alternatively, a shallow clone can instead be performed to save space on disk. This makes the source smaller and faster to clone, but can make development and updating from remote more complex.
# git clone --depth 1 -b linux-5.10.y https://github.com/embeddedTS/linux-lts

cd linux-lts/
Configure environment variables needed for building. This specifies the architecture, the cross compiler that is being used, and to set up building the kernel modules for the WILC3000 Wi-Fi/BLE module:
export CROSS_COMPILE=arm-linux-gnueabihf-  # This may be different if using a different compiler!
export ARCH=arm
export WILC=y
The WILC3000 Wi-Fi/BLE drivers are maintained and built externally out of the kernel tree. Clone this tree inside of the linux-lts/ directory (this is built later):
git clone -b linux4microchip-2021.10-1 https://github.com/embeddedTS/wilc3000-external-module/
Next, set the default configuration for this platform. Note that a minimal defconfig and a full-feature defconfig are available. The minimal defconfig contains options for supporting the device and a few common peripherals and technologies. While the full defconfig includes much more support for things like USB devices, a more broad range of netfilter/iptables filter module support, etc.
make tsimx6ul_defconfig

# The minimal defconfig can alternately be used with:
# make tsimx6ul_minimal_defconfig
Build and Install
The following will build the kernel and modules, and install the kernel, modules, and headers to a folder and create a tarball from that. This tarball can be unpacked to bootable media, e.g. microSD, eMMC, USB, etc., to update an existing bootable disk.
The script below is most easily saved as a text file and run from the command line as a script. Most terminal emulators will accept the whole script copy/pasted in to the terminal. But it is also possible to copy paste each line of text in to a terminal. In any case, the following is an example of how to compile the kernel. The script or commands used can be modified as needed to suit a specific build pipeline.
The script assumes the following environment variables are set before it is run. See the above sections for what these variables should be set to for this specific platform.
ARCH- Used to indicate the target CPU architecture.
CROSS_COMPILE- Used to point to an appropriate cross toolchain for the target platform.
LOADADDR[Optional]- Used on some platforms to tell U-Boot where to load the file.
WILC[Optional]- Set to "y" to build and install the WILC3000 Wi-Fi/BLE external modules.
#!/bin/bash -e

# Always build zImage, most common. If LOADADDR is set, then uImage is also built
TARGETS="zImage"
if [ -n "${LOADADDR}" ]; then TARGETS+=" uImage"; fi

# Build the actual kernel, binary files, and loadable modules.
# Use as many CPUs to do this as possible.
make -j"$(nproc)" && make ${TARGETS} && make modules

# Create a temporary directory to install the kernel to in order to use that as a base directory for a tarball.
# Also creates a temporary file that is used as the tarball name.
TEMPDIR=$(mktemp -d)
TEMPFILE=$(mktemp)
mkdir "${TEMPDIR}/boot/"

# Adds "arch/arm/boot/" path prefix to each TARGET
cp $(for i in ${TARGETS}; do echo arch/arm/boot/$i; done) "${TEMPDIR}"/boot/

# Copy the full .config file to the target, this is optional and can be removed
cp .config "${TEMPDIR}"/boot/config

# Copy all of the generated FDT binary files to the target
find arch/arm/boot/dts -name "*ts*.dtb" -exec cp {} "${TEMPDIR}/boot" \;

# Install kernel modules to the target
INSTALL_MOD_PATH="${TEMPDIR}" make modules_install

# Install kernel headers to the target, this is optional in most cases and can be removed to save space on the target
make headers_install INSTALL_HDR_PATH="${TEMPDIR}"

# If WILC is set to "y", then build the external module for the WILC300 Wi-Fi/BLE device.
# Note that this expects the source to be available as a subfolder in the kernel. See the above sections
# for details on getting the driver source if it is used on this specific platform.
if [ "${WILC}" == "y" ]; then
    CONFIG_WILC_SPI=m INSTALL_MOD_PATH="${TEMPDIR}" make M=wilc3000-external-module modules modules_install
fi

# Use fakeroot to properly set permissions on the target folder as well as create a tarball from this.
fakeroot sh -c "chmod 755 ${TEMPDIR};
        chown -R root:root ${TEMPDIR};
        tar czf ${TEMPFILE}.tar.gz -C ${TEMPDIR} .";

# Create a final output tarball and cleanup all of the temporary files and folder.
cp ${TEMPFILE}.tar.gz embeddedTS-linux-lts-"$(date +"%Y%m%d")"-"$(git describe --abbrev=8 --dirty --always)".tar.gz
rm -rf "${TEMPDIR}" "${TEMPFILE}"
At this point, the tarball can be unpacked to a bootable media for the device. This can be done from a booted device, or by mounting removable media from a host Linux workstation. For example, if the root folder of the target filesystem to be updated is mounted to /mnt/, the following can be used to unpack the above tarball:
# Ensure the target filesystem is mounted to /mnt first!

# Extract kernel tarball to target filesystem,
tar xhf embeddedTS-linux-lts-*.tar.gz -C /mnt| Note: | The h argument to tar is necessary on recent distributions that use paths with symlinks. Not using it can potentially render the whole filesystem no longer bootable.
|
This will correctly unpack the kernel, modules, and headers to the target filesystem which can then be booted as normal.
Linux 6.6.y
| Note: | At this time we do not have an updated userspace more recent than our Debian Stretch distribution. The Debian Stretch disk image can be used as a base and is compatible with the 6.6 kernel. If a newer userspace is needed, we recommend our Buildroot repository for building a complete system image which includes the 6.6 kernel. |
A compatible armhf cross compiler is needed for building the 6.6 kernel. We recommend using the cross compiler available in Debian distributions (the linked instructions are for Debian Stretch but will work on more recent Debian distributions as well). It is also possible to use our Buildroot repository to build a compatible cross compiler.
Download and Configure
These steps assume a host Linux workstation with an appropriate cross compiler. While on most platforms the kernel can be downloaded, built, and installed all on the device, we recommend against this due to the amount of time, memory, and disk space that can be needed for a build.
Prerequisites
In addition to a cross compiler, a number of host tools are required.
# Install dependencies for kernel build
# The following command is for Ubuntu / Debian workstations. If using a different
# distribution, please consult distribution docs for the proper commands to install
# new packages/tools/libraries/etc.
apt-get install git fakeroot build-essential ncurses-dev xz-utils libssl-dev bc flex libelf-dev bison| Note: | The above prerequisite libraries and tools may not be the complete list, depending on the workstation's distribution and age. It may be necessary to install additional packages to support kernel compilation. |
Download kernel repo on a host Linux workstation:
git clone -b linux-6.6.y https://github.com/embeddedTS/linux-lts

# Alternatively, a shallow clone can instead be performed to save space on disk. This makes the source smaller and faster to clone, but can make development and updating from remote more complex.
# git clone --depth 1 -b linux-6.6.y https://github.com/embeddedTS/linux-lts

cd linux-lts/
Configure environment variables needed for building. This specifies the architecture, the cross compiler that is being used, and to set up building the kernel modules for the WILC3000 Wi-Fi/BLE module:
export CROSS_COMPILE=arm-linux-gnueabihf-  # This may be different if using a different compiler!
export ARCH=arm
export WILC=y
The WILC3000 Wi-Fi/BLE drivers are maintained and built externally out of the kernel tree. Clone this tree inside of the linux-lts/ directory (this is built later):
git clone -b linux4microchip-2024.04 https://github.com/embeddedTS/wilc3000-external-module/
Next, set the default configuration for this platform. Note that a minimal defconfig and a full-feature defconfig are available. The minimal defconfig contains options for supporting the device and a few common peripherals and technologies. While the full defconfig includes much more support for things like USB devices, a more broad range of netfilter/iptables filter module support, etc.
make tsimx6ul_defconfig

# The minimal defconfig can alternately be used with:
# make tsimx6ul_minimal_defconfig
Build and Install
The following will build the kernel and modules, and install the kernel, modules, and headers to a folder and create a tarball from that. This tarball can be unpacked to bootable media, e.g. microSD, eMMC, USB, etc., to update an existing bootable disk.
The script below is most easily saved as a text file and run from the command line as a script. Most terminal emulators will accept the whole script copy/pasted in to the terminal. But it is also possible to copy paste each line of text in to a terminal. In any case, the following is an example of how to compile the kernel. The script or commands used can be modified as needed to suit a specific build pipeline.
The script assumes the following environment variables are set before it is run. See the above sections for what these variables should be set to for this specific platform.
ARCH- Used to indicate the target CPU architecture.
CROSS_COMPILE- Used to point to an appropriate cross toolchain for the target platform.
LOADADDR[Optional]- Used on some platforms to tell U-Boot where to load the file.
WILC[Optional]- Set to "y" to build and install the WILC3000 Wi-Fi/BLE external modules.
#!/bin/bash -e

# Always build zImage, most common. If LOADADDR is set, then uImage is also built
TARGETS="zImage"
if [ -n "${LOADADDR}" ]; then TARGETS+=" uImage"; fi

# Build the actual kernel, binary files, and loadable modules.
# Use as many CPUs to do this as possible.
make -j"$(nproc)" && make ${TARGETS} && make modules

# Create a temporary directory to install the kernel to in order to use that as a base directory for a tarball.
# Also creates a temporary file that is used as the tarball name.
TEMPDIR=$(mktemp -d)
TEMPFILE=$(mktemp)
mkdir "${TEMPDIR}/boot/"

# Adds "arch/arm/boot/" path prefix to each TARGET
cp $(for i in ${TARGETS}; do echo arch/arm/boot/$i; done) "${TEMPDIR}"/boot/

# Copy the full .config file to the target, this is optional and can be removed
cp .config "${TEMPDIR}"/boot/config

# Copy all of the generated FDT binary files to the target
find arch/arm/boot/dts -name "*ts*.dtb" -exec cp {} "${TEMPDIR}/boot" \;

# Install kernel modules to the target
INSTALL_MOD_PATH="${TEMPDIR}" make modules_install

# Install kernel headers to the target, this is optional in most cases and can be removed to save space on the target
make headers_install INSTALL_HDR_PATH="${TEMPDIR}"

# If WILC is set to "y", then build the external module for the WILC300 Wi-Fi/BLE device.
# Note that this expects the source to be available as a subfolder in the kernel. See the above sections
# for details on getting the driver source if it is used on this specific platform.
if [ "${WILC}" == "y" ]; then
    CONFIG_WILC_SPI=m INSTALL_MOD_PATH="${TEMPDIR}" make M=wilc3000-external-module modules modules_install
fi

# Use fakeroot to properly set permissions on the target folder as well as create a tarball from this.
fakeroot sh -c "chmod 755 ${TEMPDIR};
        chown -R root:root ${TEMPDIR};
        tar czf ${TEMPFILE}.tar.gz -C ${TEMPDIR} .";

# Create a final output tarball and cleanup all of the temporary files and folder.
cp ${TEMPFILE}.tar.gz embeddedTS-linux-lts-"$(date +"%Y%m%d")"-"$(git describe --abbrev=8 --dirty --always)".tar.gz
rm -rf "${TEMPDIR}" "${TEMPFILE}"
At this point, the tarball can be unpacked to a bootable media for the device. This can be done from a booted device, or by mounting removable media from a host Linux workstation. For example, if the root folder of the target filesystem to be updated is mounted to /mnt/, the following can be used to unpack the above tarball:
# Ensure the target filesystem is mounted to /mnt first!

# Extract kernel tarball to target filesystem,
tar xhf embeddedTS-linux-lts-*.tar.gz -C /mnt| Note: | The h argument to tar is necessary on recent distributions that use paths with symlinks. Not using it can potentially render the whole filesystem no longer bootable.
|
This will correctly unpack the kernel, modules, and headers to the target filesystem which can then be booted as normal.
Revisions and Changes
Software Images
Stock Images
| Revision | Changes |
|---|---|
| ts7553-V2-B-feb102017-prelim.tar.bz2 | Initial image compatible with the Rev B PCB |
| ts7553-V2-B-mar162017-prelim.tar.bz2 |
|
| ts7553-V2-B-may012017-prelim.tar.bz2 |
|
| ts7553-V2-B-jul202017-prelim.tar.bz2 |
|
| ts7553-V2-oct182017-prelim.tar.bz2 |
|
| ts7553-V2-dec152017.tar.bz2 |
|
| ts7553-V2-aug162021.tar.bz2 |
|
Linux 4.9.y Images
| Revision | Changes |
|---|---|
| ts7553-V2-linux4.9-20190402.tar.bz2 |
|
| ts7553-V2-linux4.9-20210817.tar.bz2 |
|
Linux LTS Images
| Image File | Changelog | Known Issues |
|---|---|---|
| ts7553v2-debian-bookworm-headless-20240904.tar.xz md5 |
| |
| ts7553v2-debian-12-bookworm-headless-20250711.tar.xz md5 |
|
U-Boot
| Revision | Changes |
|---|---|
| February 16, 2017 | Initial release for PCB Rev. B |
| April 5, 2017 |
|
| April 24, 2017 |
|
| October 16, 2017 |
|
| December 15, 2017 |
|
| January 15, 2018 |
|
| November 13, 2019 |
|