TS-75xx OpenEmbedded
OpenEmbedded
The OpenEmbedded distribution is an alternative to running Debian. Both distributions have their strengths and weaknesses. Debian is usually the best choice for simple applications where you are using common package such as apache, mysql, etc paired with a simple self contained application talking to any hardware peripherals. Debian is usually using older software which makes for a very stable software image. Debian is currently not as simple development where you need a cross compiling IDE, or more recent software. Debian Lenny was the last distribution of the Debian ARM releases that did not require thumb instructions. As the Cavium processor used in this product does not support thumb instructions it will not run any new Debian releases. The OpenEmbedded distribution builds the repository all from sources which allows for more recent software, and omission of the thumb instructions when the packages are built.
Similar to Debian, we provide the openembedded image in a binary form which doesn't require building everything from scratch. We host a repository that allows common packages and programming language support to be used. This distribution also still uses our initrd for common tools such as xuartctl or daqctl. OpenEmbedded is designed to provide a powerful cross compiling solution as well, and includes a cross compiler SDK, and Eclipse support for a graphical IDE with remote debugging support.
OpenEmbedded is not on the default shipping release and would need to be downloaded and installed as shown in the following sections.
Getting Started with OpenEmbedded
| File | Size |
|---|---|
| SD Image | 170MB |
| XNAND Image | 63MB |
To install you would need to insert the SD card into your desktop workstation. For example:
# use lsblk or dmesg to find your workstation's sd card in /dev/.
dd if=/path/to/sdimage.dd bs=4M of=/dev/sde conv=fsync
To write the XNAND image, first download the image to a thumbdrive, or SD card and boot the board:
mount -o ro /dev/sda1 /mnt/host/
nandctl -XW 2048 -z 131072 -i /mnt/host/xnandimage.dd # This will take 10-15 minutes
Once installed on the board you can power it as normal and watch the serial console. The first boot will take significantly longer while it finishes some setup. Once booted, you will be brought to a login prompt:
Poky 8.0 (Yocto Project 1.3 Reference Distro) 1.3
 tsconsole

ts7500 login:
As with Debian, you can login using the "root" user and no password. The SD image requires 488MB of your SD card, while the XNAND image requires ???MB.
Configure OpenEmbedded
Network Configuration
From almost any Linux system you can use "ip" or the ifconfig/route commands to initially set up the network. To configure the network interface manually you can use the same set of commands in the initrd or OpenEmbedded.
# Bring up the CPU network interface
ifconfig eth0 up

# Or if you're on a baseboard with a second ethernet port, you can use that as:
ifconfig eth1 up

# Set an ip address (assumes 255.255.255.0 subnet mask)
ifconfig eth0 192.168.0.50

# Set a specific subnet
ifconfig eth0 192.168.0.50 netmask 255.255.0.0

# Configure your route.  This is the server that provides your internet connection.
route add default gw 192.168.0.1

# Edit /etc/resolv.conf for your DNS server
echo "nameserver 192.168.0.1" > /etc/resolv.conf
Most commonly networks will offer DHCP which can be set up with one command:
Configure DHCP in OpenEmbedded:
# To setup the default CPU ethernet port
dhclient eth0
# Or if you're on a baseboard with a second ethernet port, you can use that as:
dhclient eth1
Configure DHCP in the initrd:
udhcpc -i eth0
# Or if you're on a baseboard with a second ethernet port, you can use that as:
udhcpc -i eth1
To make your network settings take effect on startup in OpenEmbedded, edit /etc/network/interfaces:
 # /etc/network/interfaces -- configuration file for ifup(8), ifdown(8)
 auto lo
 iface lo inet loopback

 auto eth0
 iface eth0 inet static
   address 192.168.0.50
   netmask 255.255.255.0
   gateway 192.168.0.1
 auto eth1
 iface eth1 inet dhcp
In this example eth0 is a static configuration and eth1 receives its configuration from the DHCP server. You can enact all changes in the interfaces file immediately by running:
/etc/init.d/networking restart
To make your changes permanent in the initrd you will need to edit the linuxrc script. Use the same commands you would use to manually configure it and place them over the current ifconfig calls.
Installing New Software
We have included opkg in the distribution which can download additional packages from the repository hosted on our FTP. To install or search packages, you must first connect to the internet and run:
opkg update
This will download the package lists and descriptions from the FTP. You can then search for packages using:
# Search by package name
opkg list-all | grep nameorregex

# Search by file.  For example, to find the package
# that provides /usr/bin/java, you would search for either the full path, or *java:
opkg search *java
Development
Install the SDK
While Openembedded contains an onboard toolchain that can be used to compile, it also includes a cross compiler that can run from a compatible X86/X64 Linux host.
| File | Size |
|---|---|
| X86 Linux Toolchain | 150MB |
| X86_64 Linux Toolchain | 152MB |
Download either file and execute the installer:
# X86
chmod a+x poky-eglibc-i686-arm-toolchain-gmae-1.3.sh
./poky-eglibc-i686-arm-toolchain-gmae-1.3.sh

## Alternatively if you are running X64
chmod a+x poky-eglibc-x86_64-arm-toolchain-gmae-1.3.sh
./poky-eglibc-x86_64-arm-toolchain-gmae-1.3.sh
Install Eclipse
The OpenEmbedded distribution is designed to work well with graphical IDEs such as Eclipse. To get started, download Eclipse Classic for your Linux X86 or X64 system here. This has been tested with Eclipse 4.2, and it is not recommended to use the Eclipse build provided by your distribution.
To install:
sudo tar xf eclipse-SDK-4.2.2-linux-gtk.tar.gz -C /opt/
To launch Eclipse:
/opt/eclipse/eclipse &
Once Eclipse is installed and running you will need to add c/c++ and remote debugging support. To install the required plugins follow these steps.
| Launch Eclipse and select "Help -> Install New Software" | 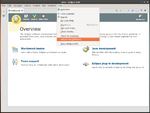
| ||||||
| Click "Add" and Add the Juno repository at "http://download.eclipse.org/releases/juno". | 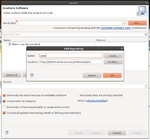
| ||||||
Click the "Work with:" drop down and select the Juno repository you just added. In the tree view below, select these options:
| |||||||
| Once the projects have been selected, Click next and finish to begin the installation. Once this has finished restart the Eclipse IDE. | 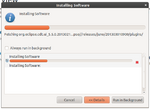
| ||||||
| On startup return to the "Install New Software" option to add the Poky plugin. Click "Add" and add the Yocto repo at "http://downloads.yoctoproject.org/releases/eclipse-plugin/1.3". Click the "Work with:" drop down and select the Yocto repository you just added. Select the option "Yocto plugin for Eclipse". Continue the install, and restart Eclipse when it is finished. | 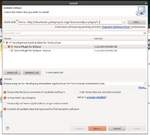
| ||||||
| To configure the cross toolchain, to to Windows->Preferences | 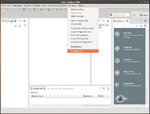
| ||||||
Select the "Yocto Project ADT". Our provided toolchain is a standalone pre-built toolchain. For the "Toolchain Root Location", enter "/opt/poky/1.3", or to another location if you installed the board SDK elsewhere. The "Sysroot" is the path to the filesystem on the embedded board. This can be the XNAND or SD roots. Our defaults are available here:
For example, to use the sd root: sudo tar -cvzf sdroot.tar.gz -C /opt/sdroot/
For your Sysroot, you would specify /opt/sdroot. Alternatively you can mount the SD card and use this as your Sysroot. |
File:EclipseYoctosMenu.png | ||||||