TS-SDK
 | |
| Netbeans C/C++ Documentation | |
| Download | |
|---|---|
| Product Page | |
| Latest Version | |
| 1.0 | |
| Supported Boards | |
| TS-4800 |
Overview
The TS-SDK is a package of compilers and utilities to assist in development with our boards. This also includes Netbeans plugins for our various boards to support cross compilation using C/C++, or remote compilation for remote debugging.
This has been tested under Ubuntu 10.04, Ubuntu 11.10, Debian Lenny, and Debian Squeeze. This should run on any x86 compatible system that is capable of running Netbeans. If you are running on a 64bit OS, make sure you install 32 bit compatibility libraries.
This SDK is not intended to be run on other operating systems such as Windows or OSX, though this may include limited support for using the onboard GNU tools in the feature.
Getting Started
The SDK can be downloaded here. This will install utilities to /opt/ts/, and create a file in /etc/profile.d/ to add /opt/ts/bin/ to your path.
To install the SDK simply execute the .sh file as root:
chmod a+x ./ts-sdk-installer.sh
./ts-sdk-installer.sh
After this has been run you will need to log out of your x11 session and log back in. You can verify the toolchains have been found in your path by running:
arm-eabi-glibc-2008q3-gcc --version
Features
Toolchains
The included toolchains are relinked to the /opt/ts/bin/ directory which includes both an OABI and EABI compiler. For EABI (most boards) the compiler is arm-eabi-glibc-2008q3-<tool>, or for OABI it is arm-oabi-glibc-2008q3-<tool>
Utilities
The included utilities currently include xuartctl, tsctl, and daqctl. These all have TCP interfaces and can work with the TCP servers of each application that natively runs on the board.
A useful example would be if you are developing serial code to run on the board you can create the XUART local to your PC. This way you can use your native fast compilers to write the code before moving it to the board. From an x86 workstation:
# The port will be 7350 + the XUART port number.  This will open XUART 0
xuartctl --speed 115200 --server --port=boardiporhostname:7350
# You can use the /dev/pts/# from the output for serial code that will run on the board.

# You can also link this to a standard /dev/ node with eval:
eval `xuartctl --speed 115200 --server --port=boardiporhostname:7350 2>&1`; ln -s $ttyname /dev/xuart0
| Note: | xuartctl must be run as root. |
See xuartctl for more examples.
Netbeans Plugins
The Netbeans plugins define toolchains specific to the processors used in our boards. This may include options ARM for sub-architectures, or specific options for utilizing optional processor features such as an FPU.
Installation
First you must install Java and Netbeans and run ts-sdk-installer.sh. Netbeans installation is distribution specific, so you should refer to your distribution's documentation for more details.
These plugins are targeted to Netbeans 7.0 and above, so if your distribution does not include support for at least this version you should go through the generic installer. This includes any Debian distribution below Wheezy:
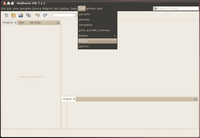
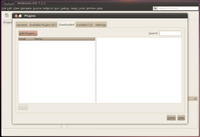
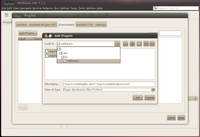
Netbeans Generic Installer - Select C/C++.
| Note: | If you do not have a C/C++ option, make sure you have the C/C++ Netbeans module installed. |
Once you see the additional toolchains you can move on to starting your first project or adding remote development hosts.
Netbeans Remote Development Host
Using a remote host has four requirements.
- A valid network address that can be reached from your workstation
- A toolchain installed on the board
- An ssh account with a password to access the root user
- A path mapped between the two boards
- Can be any protocol supported by the two stations. (NFS, SSHFS, CIFS, etc)
To set up ssh on most boards, first boot to the full Debian installation and then set the board up with a valid network address. This is commonly done through dhclient, udhcpc, pump, or setting the address manually in /etc/network/interfaces. Refer to the Debian page for the common examples.
Once you have a network address install openssh-server if it is not already installed. When it is preinstalled, we will often remove the ssh keys for security purposes so they will need to be regenerated. This command only needs to be run once on the board:
dpkg-reconfigure openssh-server
Netbeans will use the GNU tools available on the board so they will need to be installed. This is recommended to run from the SD card. The XNAND may be capable but is space constrained.
apt-get update && apt-get install build-essential cmake -y
Next you will need to set a password for root. We always ship with a blank password, but this can only be used for local access. For remote access a password must be set. To set a password simply run this as root through the serial console:
passwd
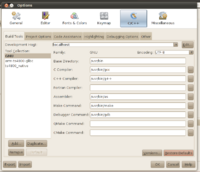
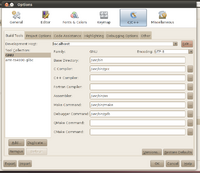
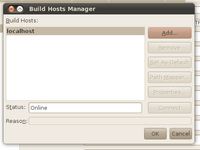
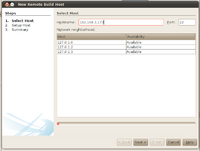
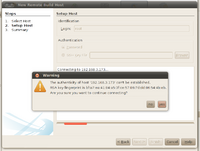
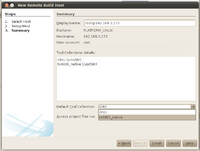
Now from Netbeans you can add this as a remote host.
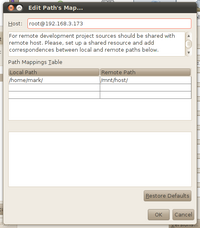
At this point you will need to set up path mappings to the board. It is recommended to use NFS server from a linux workstation since this will be the most efficient. You will need to follow the documentation provided by your distribution:
I would recommend exporting your home directory, or at very least your NetBeansProjects directory. The export needs to be a parent to the project directory, or the project directory itself. For example I have exported /home/mark/. Once you have the server setup you should test the connection from the board.
# For example, my host IP is 192.168.1.153, and my home directory in /home/mark/ is exported.
mount -t nfs 192.168.1.153:/home/mark/ /mnt/host/

# If this fails, try connecting with an older version of NFS such as 2 or 3
mount -t nfs -o vers=2 192.168.1.153:/home/mark/ /mnt/host/

# If it still fails then you will need to refer to your distribution's documentation for more troubleshooting
You can add this to your /etc/fstab on the board so that it will mount automatically on startup:
192.168.1.153:/home/mark/ /mnt/host/ nfs
Click Ok on both the path mapper and Options window and now you are ready to build your first project.
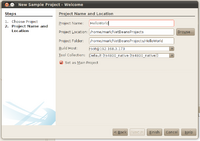
Hello World
Once you have the #Remote Development Hosts added you can procede with your first project that builds on the board.
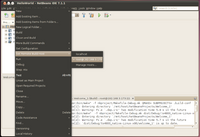
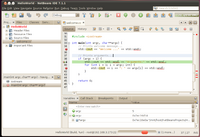
Now you can use menu Run->Main Project (F6) to run the project, or Debug->Debug Main Project. Netbeans has more documentation on the more advanced usage of the IDE here.
