TS-4900 QT5 Hello World: Difference between revisions
No edit summary |
(Reorder photos for setup) |
||
| (9 intermediate revisions by 2 users not shown) | |||
| Line 1: | Line 1: | ||
Open the | Open the Qt Creator IDE and click <source inline>New Project</source>. | ||
{| | {| | ||
| [[File:qtnewproject.png|300px|right| | | [[File:qtnewproject.png|300px|right|Qt New Project]] | ||
|} | |} | ||
Qt provides multiple templates for application development. For this example select the default <source inline>Qt Widgets Application</source>. | |||
{| | {| | ||
| [[File:qtwidgetsapp.png|300px|right| | | [[File:qtwidgetsapp.png|300px|right|Qt Widgets App]] | ||
|} | |} | ||
Specify the location for your project. Keep in mind that the compile process will create | Specify the location for your project. Keep in mind that the compile process will create more build paths in the <source inline>Create In:</source> path. | ||
{| | {| | ||
| [[File:qtintorandlocation.png|300px|right| | | [[File:qtintorandlocation.png|300px|right|Qt Location]] | ||
|} | |} | ||
Next, select the kit. | Next, select the kit. The <source inline>TSIMX6</source> is the kit we set up in the last section, but you may have other kits pre-installed on your system. These can be used for testing graphical development on your PC. Keep in mind distribution versions may contain different functionality. | ||
{| | |||
| [[File:qtselectkit.png|300px|right|Qt Select Kit]] | |||
|} | |||
Next select the class and filename information. This example will use the defaults. | |||
{| | {| | ||
| [[File: | | [[File:qtselectclasses.png|300px|right|Qt Select Classes]] | ||
|} | |} | ||
Select any version control for the project. The example will use none and finish the wizard. This will generate the new project. | |||
{| | {| | ||
| [[File: | | [[File:qtprojectmanagement.png|300px|right|Qt Project Management]] | ||
|} | |} | ||
Now return to edit, and open | Click the button under <source inline>Help</source> on the left column, and select <source inline>TSIMX6</source> debug. If there is only one kit selected, this will be default. | ||
{| | |||
| [[File:qtselectbuild.png|300px|right|Qt Select build]] | |||
|} | |||
Now return to edit, and open the Qt project file, <source inline>qt5-helloworld.pro</source>. Add in these lines anywhere after the target is specified: | |||
<source lang=bash> | <source lang=bash> | ||
linux-* { | linux-* { | ||
target.path = /home/root | target.path = /home/root | ||
INSTALLS += target | INSTALLS += target | ||
} | } | ||
</source> | </source> | ||
{| | {| | ||
| [[File: | | [[File:qteditprojectfile.png|300px|right|Qt pro file]] | ||
|} | |||
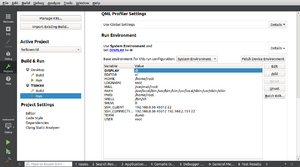
Last, the <source inline>DISPLAY</source> must be selected. This is done by setting a run environment variable that will be set when the application is run on the board. | |||
{| | |||
| [[File:qtcreatorruntimedisplay.png|300px|right|Qt run environment settings]] | |||
|} | |||
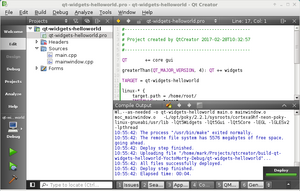
At this point click the green allow in the bottom left to run the application. This can also be launched from the menu at <source inline>Build->Run</source>. | |||
{| | |||
| [[File:qtbuildanddeploy.png|300px|right|Qt Build and Deploy]] | |||
|} | |} | ||
From here, you can begin customizing your application. Refer to the official Qt documentation for more information | |||
* [http://qt-project.org/doc/qt-5/index.html | * [http://qt-project.org/doc/qt-5/index.html Qt 5 Documentation] | ||
Latest revision as of 16:28, 7 April 2020
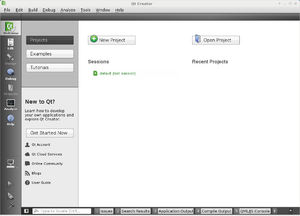
Open the Qt Creator IDE and click New Project.
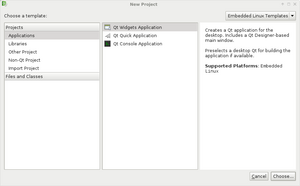
Qt provides multiple templates for application development. For this example select the default Qt Widgets Application.
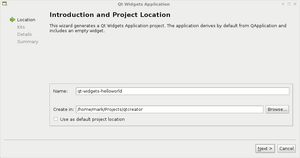
Specify the location for your project. Keep in mind that the compile process will create more build paths in the Create In: path.
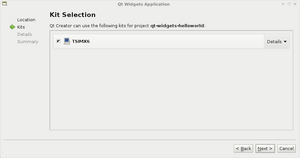
Next, select the kit. The TSIMX6 is the kit we set up in the last section, but you may have other kits pre-installed on your system. These can be used for testing graphical development on your PC. Keep in mind distribution versions may contain different functionality.
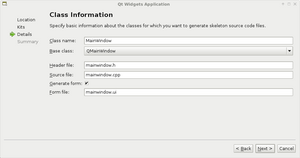
Next select the class and filename information. This example will use the defaults.
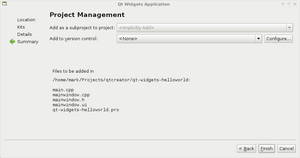
Select any version control for the project. The example will use none and finish the wizard. This will generate the new project.
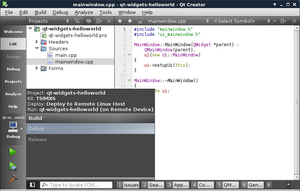
Click the button under Help on the left column, and select TSIMX6 debug. If there is only one kit selected, this will be default.
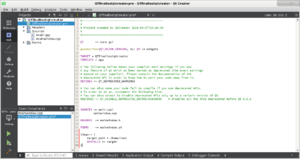
Now return to edit, and open the Qt project file, qt5-helloworld.pro. Add in these lines anywhere after the target is specified:
linux-* {
    target.path = /home/root
    INSTALLS += target
}
Last, the DISPLAY must be selected. This is done by setting a run environment variable that will be set when the application is run on the board.
At this point click the green allow in the bottom left to run the application. This can also be launched from the menu at Build->Run.
From here, you can begin customizing your application. Refer to the official Qt documentation for more information
